
One of the primary reasons organizations are moving to Windows 10 is to take advantage of the new security features Credential Guard and Device Guard that Microsoft offers to enhance enterprise security. Credential Guard isolates secrets to prevent "pass the hash" attacks. Device Guard prevents untrusted apps from being run on your systems. More information on these can be found here for Credential Guard and here for Device Guard. What we are going to discuss today in Part 1 of this series are some of the fundamentals to upgrading your existing Windows 7 systems to Windows 10 and converting them from legacy BIOS booting to the modern UEFI with Secure Boot which is required for these new security capabilities Microsoft offers. In Part 2 and Part 3 we will cover in depth methods to address some of the issues often encountered during the process.
With the release of Windows 10 1703 Creators Update, Microsoft introduced a tool for performing the conversion of a disk from MBR to GPT in a non-destructive manner. Prior to this release, the process for converting a drive from the GPT format to support UEFI and Secure Boot involved backing up the user's data and settings, reformatting the drive, applying the new operating system, reinstalling the applications and restoring the user's data and settings. With MBR2GPT, in many cases you can simply perform the "In-Place Upgrade" to Windows 10, convert the drive the GPT format and change the system to settings to boot using UEFI with Secure Boot in less time than the previous method required. This is because, with the In-Place Upgrade, the applications, user data, and settings all remain in place.
The Task Sequence
In the examples below, we will be using a basic "Upgrade an operating system from an upgrade package" SCCM task sequence as our foundation and adding in the MBR2GPT conversion step along with the 1E BIOS to UEFI steps to finish out the process.
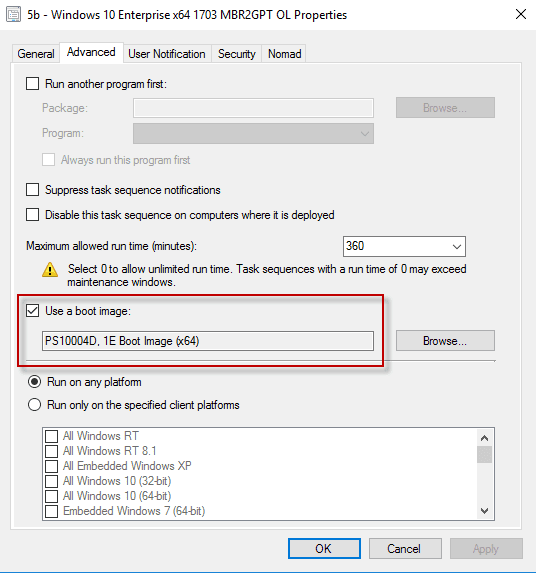
In this task sequence, we pick up after we perform the standard Windows 10 In-Place upgrade. The first thing we'll do is to restart our system to WinPE. Note that a typical upgrade task sequence will not have a boot image assigned to it, so we have done that on the Properties – Advanced tab:

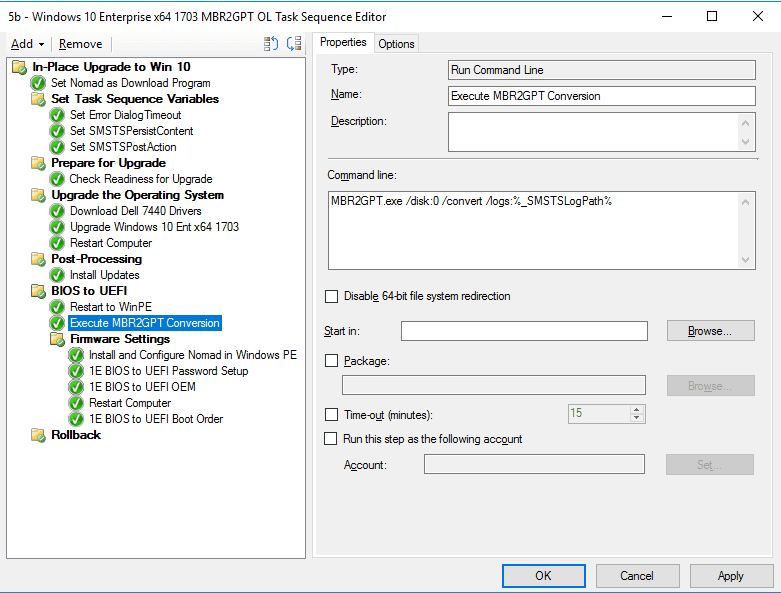
Once we have restarted in WinPE, we will then execute the MBR2GPT conversion of the drive with the following command:
MBR2GPT.exe /disk:0 /convert /logs:%_SMSTSLogPath%
After the successful MBR2GPT conversion we move into changing the firmware settings using the 1E BIOS to UEFI tools. We have placed these in a group and put a condition so the group will only run if the MBR2GPT step finished successfully as we would not want to change the firmware over if the MBR2GPT conversion was not completed successfully.

Before we proceed with the firmware changes, we need to ensure that Nomad is installed and running in WinPE: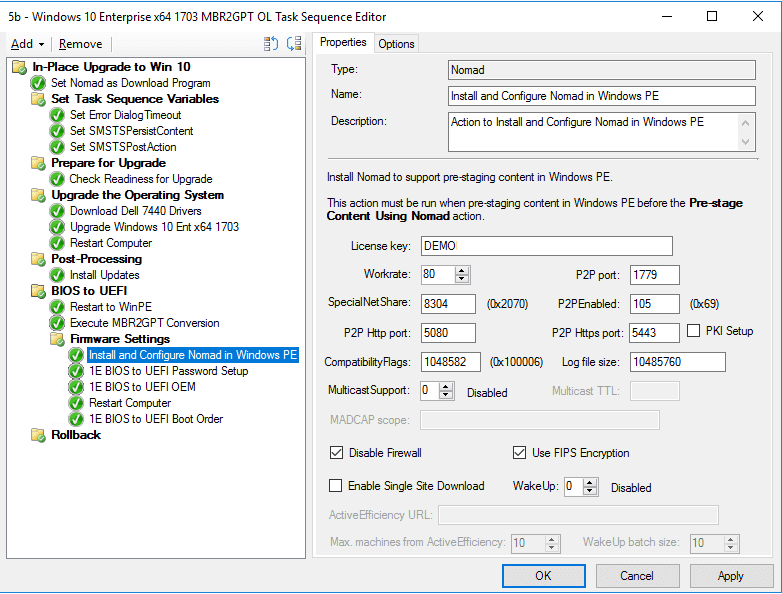
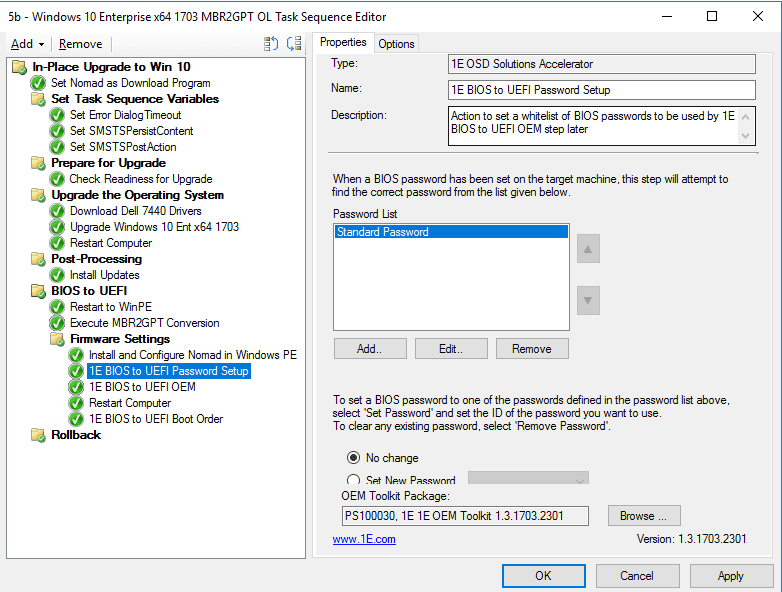
The 1E BIOS to UEFI tools allow us to work with either Dell, HP or Lenovo hardware models with all of the command line syntaxes addressed automatically. The first step is to unlock the BIOS if a password has been set on it:
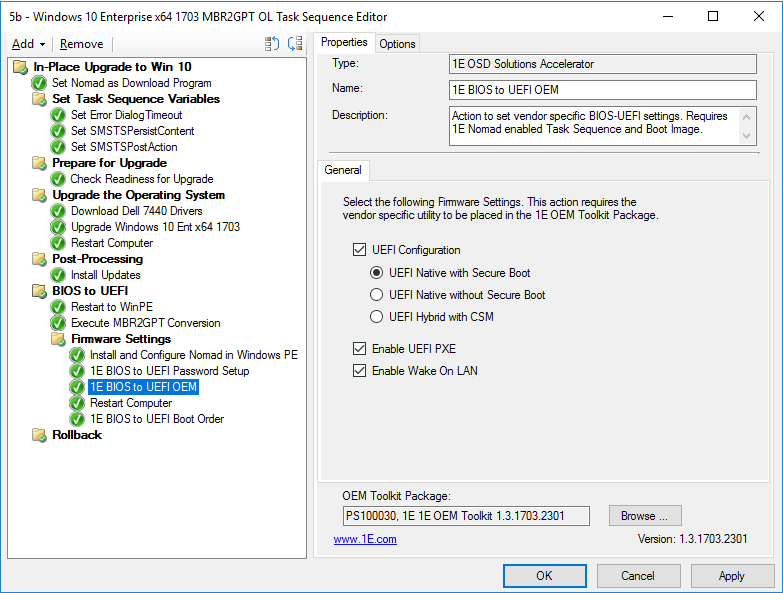
Next, we will perform the firmware changes:
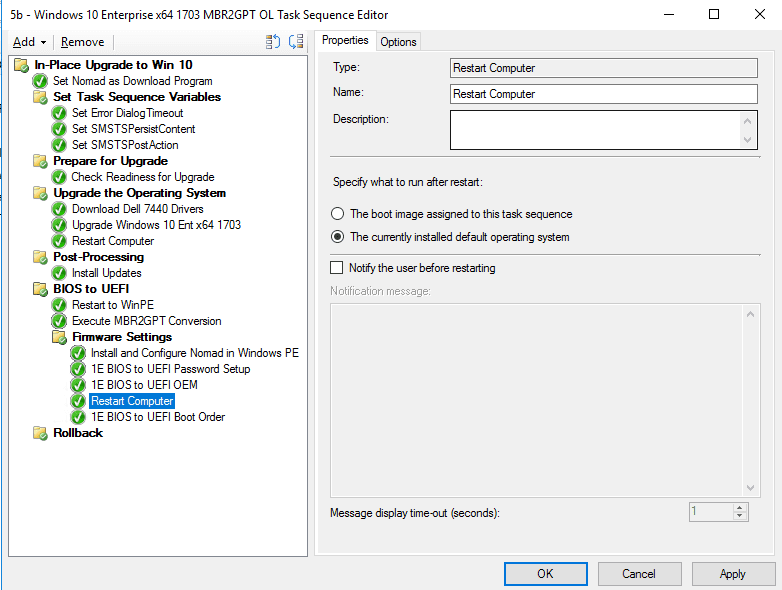
After the firmware settings are changed, we need to restart the system to allow them to take effect before changing the boot order on Dell systems if we have enabled UEFI PXE. We will restart to the full OS as we no longer need to be running in WinPE.
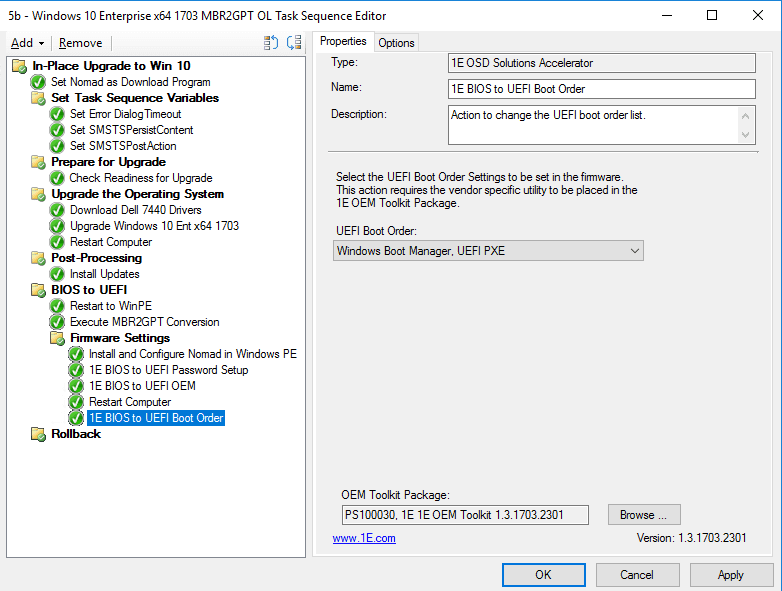
After the restart, we set the boot order and the task sequence completes with a system that has been migrated from Windows 7 to Windows 10 as well as the firmware changed from legacy BIOS to UEFI.
As I stated in the beginning, this is a basic Windows 10 upgrade task sequence designed to convey the fundamentals of the BIOS to UEFI and MBR2GPT conversion. In Part 2 and Part 3 of this series, we will dive into detecting and addressing issues such as legacy recovery partitions that can prevent a successful MBR2GPT conversion, managing BitLocker during the upgrade, enabling the TPM and other error handling techniques.
For more information on the MBR2GPT tool, check it out here. Stay tuned for parts 2 and 3 of this series.


