I have been involved in creating High Availability solutions for our NightWatchman Enterprise products and as part of that work have recently worked with Windows Failover Clustering and NLB clustering in Windows Server 2012. I thought it might be good to share my experiences with implementing these technologies. I've built multi-node failover clusters for SQL Server, Hyper-V, various applications, and Network Load Balancing clusters. The smallest clusters were two node SQL Server clusters. I've built 5 node Hyper-V clusters. The largest clusters I've built were VMware clusters with more than twice that number of nodes.
I will cover the creation of a simple two-node Active/Passive Windows Failover Cluster. In order to create such a cluster it is necessary to have a few items in place, so I figured I should start at the beginning. This blog will address connection to shared storage using the iSCSI initiator. The other installments in this series will be:
Clusters need to have shared storage and that is why I am starting with this topic. You can't build a cluster without having some sort of shared storage in place. For my lab I built out a SAN solution. Two popular methods of connecting to shared disk are iSCSI or FibreChannel (yes, that is spelled correctly). I used iSCSI, mainly because I was using a virtual SAN appliance running FreeNAS that I had created on my vmWare host and iSCSI was the only real option. In a production environment you may want to use FibreChannel for greater performance.
To start I built two machines with Windows Server 2012 and added three network adapters to these prospective cluster nodes. One is for network communications and is on the LAN. The second was for iSCSI connectivity (other methods can be used to connect to shared storage but I used iSCSI as mentioned above). The third was for the cluster Heartbeat network. It is the Heartbeat the monitors cluster node availability so that a failover can be triggered when a node hosting resources becomes unavailable. These three network adapters are all connected to three separate networks and the iSCSI and Heartbeat NICs were attached to isolated segments dedicated to those specific types of communication.
When you are done building out the servers they should be exactly the same. This is because the resources hosted by the cluster (disks, networks, applications) may be hosted by any of the nodes in the cluster and any failover of resources needs to be predictable. If an application requiring .NET Framework 4.5 is running on a node that has .NET Framework 4.5 installed and the other node in the cluster does not then the application will not be able to run if it has to fail over to the other node, rendering your cluster useless.
Configure the network interfaces on the systems. Ensure that they can communicate with the other interfaces on the same network segment (including the shared storage that the iSCSI network will connect to). On the LAN segment include the Gateway and DNS settings because this network is where all normal communications occur and it will need to be routed through your network. For the iSCSI and Heartbeat networks you only need to provide the IP address and the subnet mask. I used a subnet mask of 255.255.255.240 on the iSCSI and Heartbeat networks in my lab setup since there were only two machines. Companies often use very limited subnet sizes for those networks. You do not need to provide a gateway or a DNS server since these networks are single, isolated subnets and their communication will not be routed to any other subnet.
The steps I have used to configure iSCSI are as follows:
| Step |
Description |
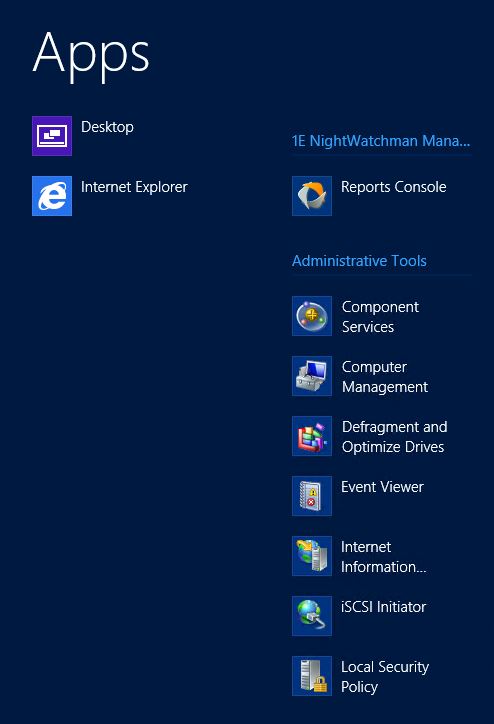 |
Run the iSCSI Initiator from the Server 2012 Apps page |
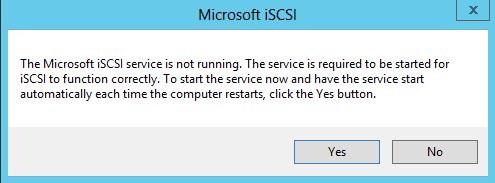 |
Click Yes to have the iSCSI initiator service start and set it to start Automatically each time the computer restarts. You want this to start automatically so that the cluster nodes will be able to automatically connect to the shared storage when they reboot. |
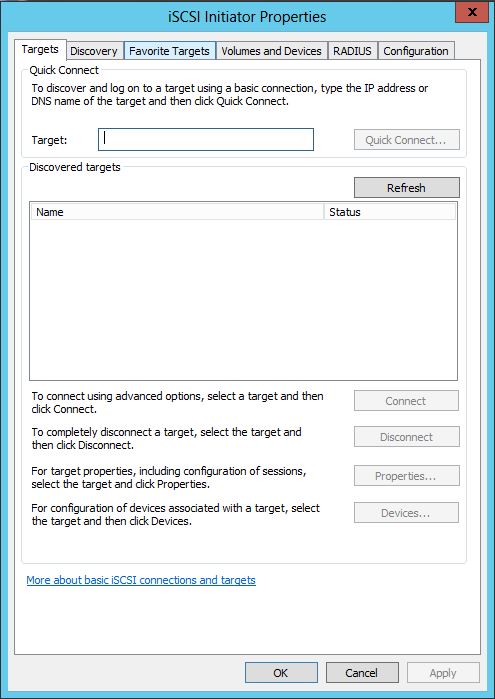 |
The iSCSI Initiator open to the Targets page. Select the Discovery page to continue. |
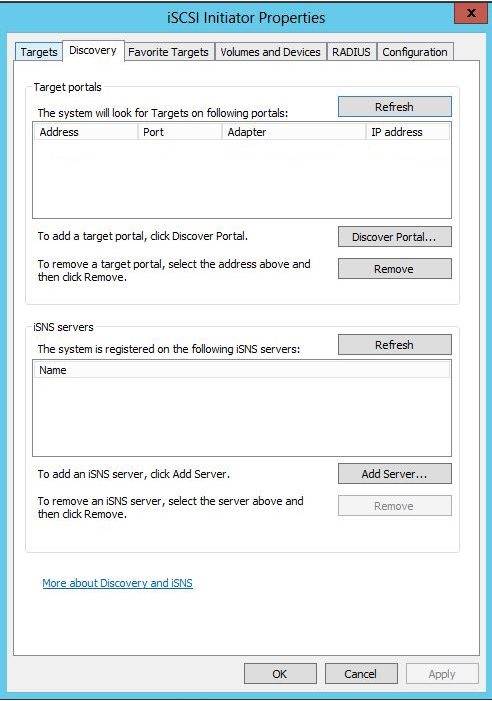 |
There will be no target portals listed when you first open the page. Click the Discover Portal button. |
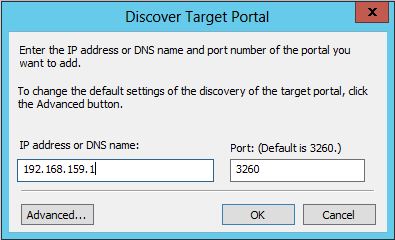 |
Enter the IP Address of the shared storage iSCSI interface in the IP Address or DNS Name box. The port should be automatically set to 3260. Click Advanced. |
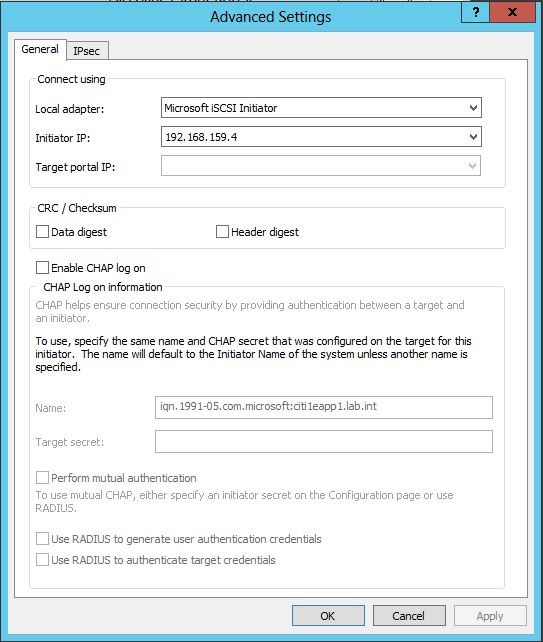 |
In the Advanced dialog select Microsoft iSCSI Initiator from the Local Adapter dropdown box and select the IP Address of the NIC that is dedicated to your iSCSI connection in the Initiator IP box. Click OK to close the Advanced Settings dialog and click OK to close the Discover Target Portal dialog. |
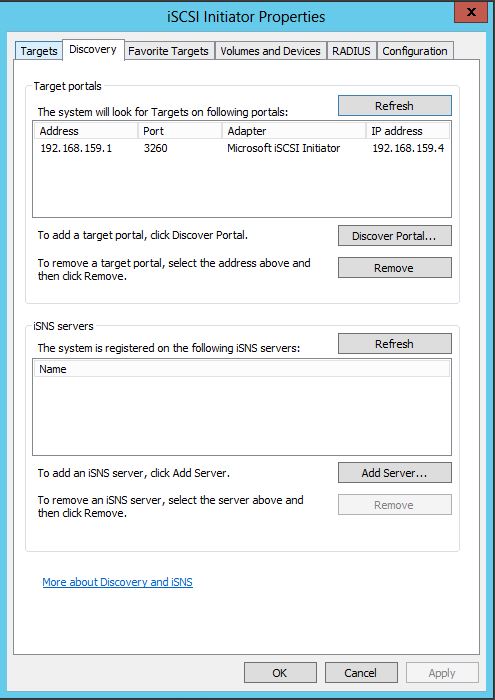 |
At this point the target portals list on the Discovery page will contain the shared storage you configured as shown in the previous step.Now you need to connect to LUNs on the shared storage. |
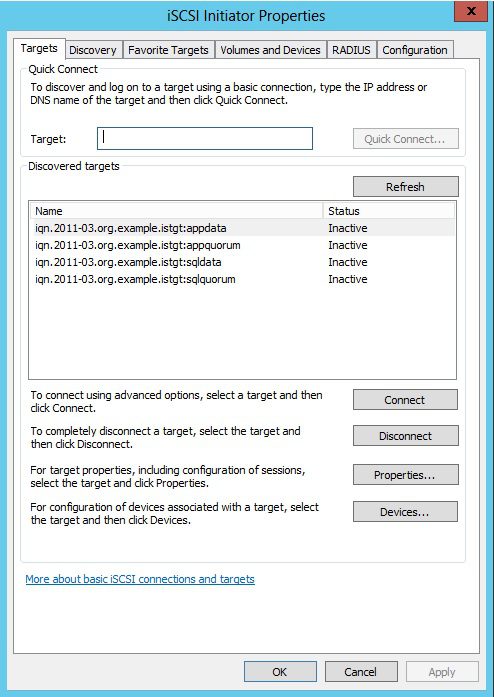 |
Next you need to switch to the Targets page. Here you will see the LUNs that are available for you to connect to. Select the LUNs you wish to connect to and click the Connect button. It is a good practice to name your LUNs in such a way that they can be easily identified. In this example I have two sets of LUNs available, one for a SQL cluster and one for an App cluster. Both sets contain LUNs to serve as data and quorum disks on my cluster nodes. |
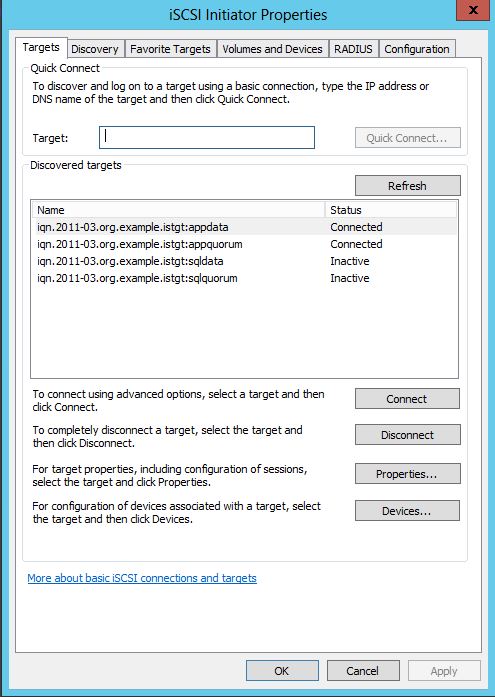 |
The Targets page will look something like the example shown here. At this point you are connected to your iSCSI target. |
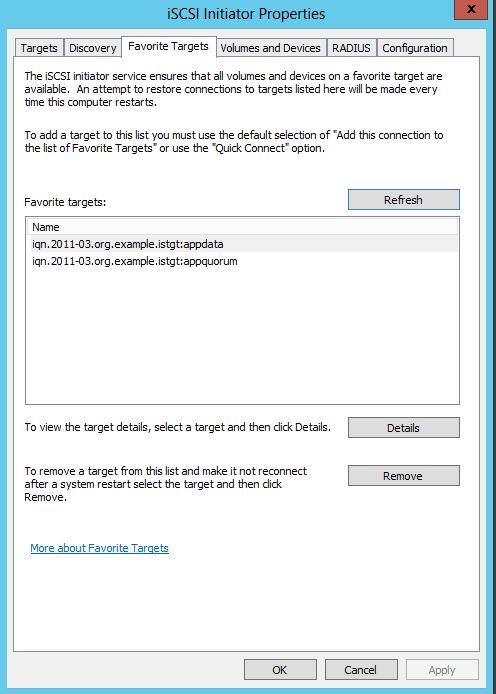 |
If you switch to the Favorite Targets page you should now see a list of the LUNs on the iSCSI target you connected to. The LUNs listed here will be automatically connected whenever the machine is rebooted. |
The next installment will be on configuring these new disks in the OS as you continue preparing to create your cluster. Until then, I wish you all a great day!


