
Hello to you today, and thanks for visiting this blog. My name is John DeVito, and I am a Senior Customer Success Architect here at 1E. In this blog, I want to look at Linux and package updates.
Like any other OS, it's important to keep Linux systems up to date. Linux updates are determined by comparison against the repository that a device is configured to use. By default, Linux distros are configured to use a mirror on the Internet for updates, much like Microsoft uses Windows Update. And—just as Windows can be configured to look at WSUS as an internal source for updates—an internal Linux repository can be created for machines to use as an update source.
The examples shown cover several different Linux distros, and the names of the devices you'll see in the screenshots reference the distro.
| Partial Name | Distro |
| LABDBX64 | Debian |
| LABUX64 | Ubuntu |
| LABFX64 | Fedora |
| LABC#X64 | CentOS |
| LABRX64 | RedHat |
| LABSX64 | openSUSE |
The distro isn't as important to this instruction as the Package Manager for the distro. The instructions in this blog work with dnf, yum, apt, and zypper. In the event there are multiple package managers installed, dnf is preferred above yum, then apt, and finally zypper are scanned.
Repository configuration
Linux can be configured to use different repositories from which to obtain updates. If you wish to use the default repository locations to scan for updates, you don't need to do anything. But if you want to scan against an updated repository or create your own internal mirror, then you need to configure your devices to use those locations.
Get current repository configuration
The first instruction we'll look at is Get Configured Linux Repositories. This instruction works with all four of the listed package managers.
The instruction allows a specific package manager to be selected, or all supported package managers can be selected. The state of the repository entry (enabled, disabled, or all) can be selected as well.

The data returned may contain some fields marked N/A, depending on whether that field applies to the repository configuration on that distro. If the field applies but isn't configured for the entry, the field will contain "Value Not Present."
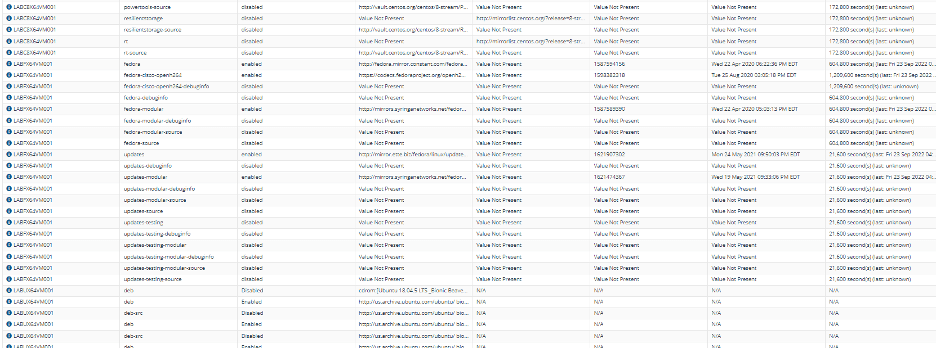
The fields returned are DeviceName, RepoId, Status, BaseURL, Mirrors, Revision, LastUpdated, and Expiration.
Some of the fields, especially the one containing the Base URL for the repository, will be truncated. To see the values completely, and to facilitate cut and paste to the Edit Repository instructions, exporting the results to a CSV file and opening them in Excel is useful.
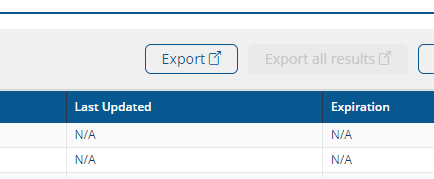
To Export the results, click the Export button at the top of the results table in the browser.
Then open the detailedResults.csv file in Excel. Here you can expand the field and see the entire contents.
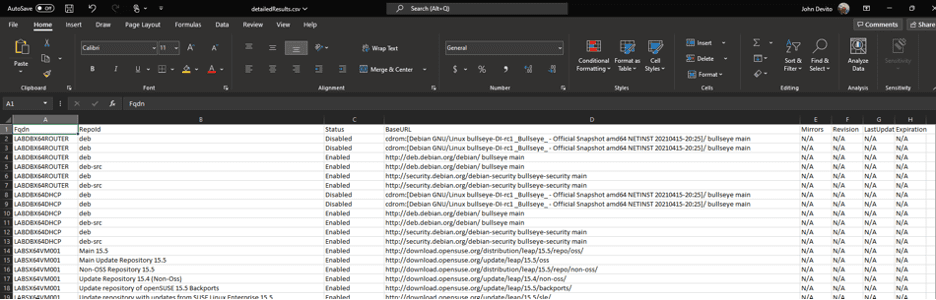
Not only is this helpful in identifying the full setting value, but it also allows you to cut and paste the values from the spreadsheet into the Edit Repository instruction parameter if you only need to make a small modification. E.g., when the openSUSE repository in my lab expired and the distro version went EoL, I needed to update it to a new repository version. I was then able to do a Full-Upgrade to a new version of openSUSE by running the Update Linux Packages instruction covered further on in this blog.
Updating repository configuration
There are three Edit Repository instructions to update a repository. Combining all of the package manager methods into one instruction proved to be a problem. The final instruction was too large for 1E Platform to run (for performance reasons, instruction sizes are limited. They're large enough to be quite flexible, but in this case, it was just too much code, so it had to be broken up). There are the Edit Linux apt Repository, Edit Linux zypper Repository, and Edit Linux Yellowdog Repositories instructions. The instructions allow repositories to be added to the configuration as either enabled or disabled.
Regarding Yellowdog repositories, if the repository can't be contacted it can't be enabled, and the addition of the repository would normally fail. The 1E Platform instruction is written with this in mind. If a repository can't be contacted, it's created with a status of disabled. This will allow you to add a future repository to the configuration and enable it when that repository "goes live".
All the Edit Linux Repository instructions are used in the same way. There are four parameters that the user can configure.
| Parameter | Type | Values |
| Action | Dropdown | Add, Remove, Enable, Disable |
| RepoId | Edit Field | Free Text |
| BaseURL | Edit Field | Free Text |
| Status | Dropdown | Enabled, Disabled |
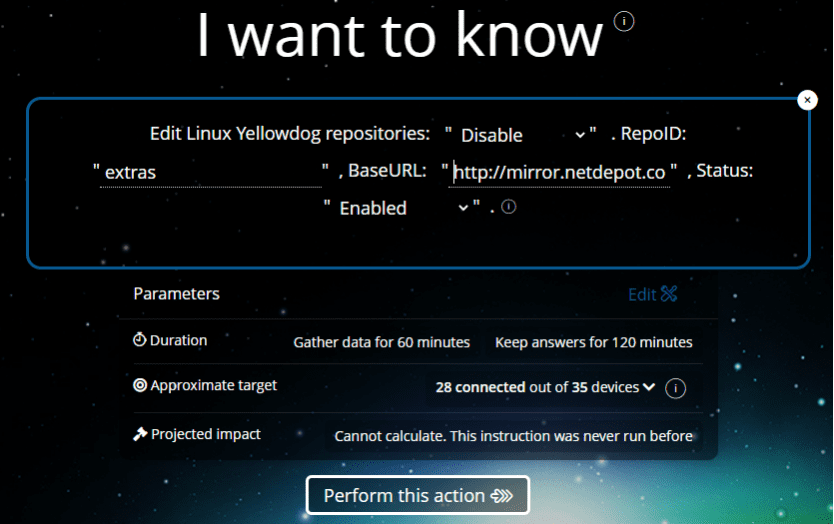
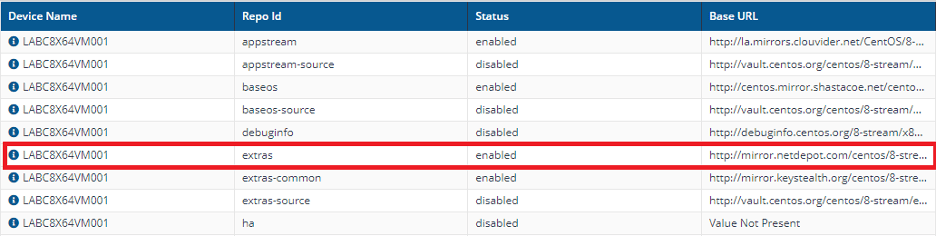
As an example, I want to disable the "extras" repository on a CentOS8 Stream device if it is enabled. "extras" is the RepoId. The BaseURL for the repository is https://mirror.netdepot.com/centos/8-stream/extras/x86_64/os/. I can use the "Get Configured Linux Repositories" instruction I ran above to show this information.
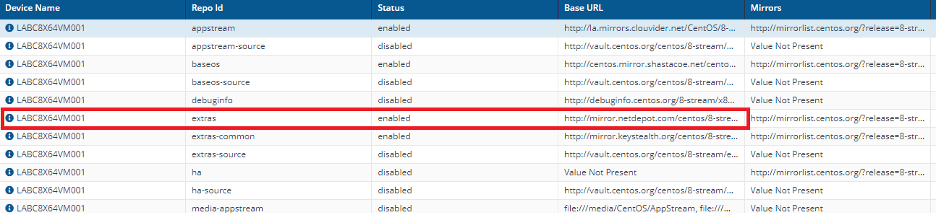
The highlighted repository above shows me that the "extras" repository on the CentOS8 Stream is enabled. CentOS8 Stream uses the dnf package manager, so I would use the "Edit Linux Yellowdog Repositories" instruction to make that configuration change. The Action is configured as "Disable", the RepoId as "extras", and the BaseURL as "https://mirror.netdepot.com/centos/8-stream/extras/x86_64/os/". The status field in this case doesn't matter. You wouldn't disable a repository that's already disabled.
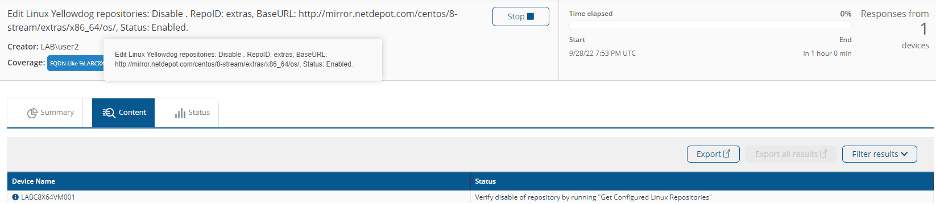
As always, when clicking "perform this action" the user is reauthenticated for confirmation. Since the instruction will make a change on the endpoint(s) targeted, it requires approval before it executes on the device(s). The instruction shows the status after it's run and suggests that the "Get Configured Linux Repositories" instruction be run again to validate the configuration change.
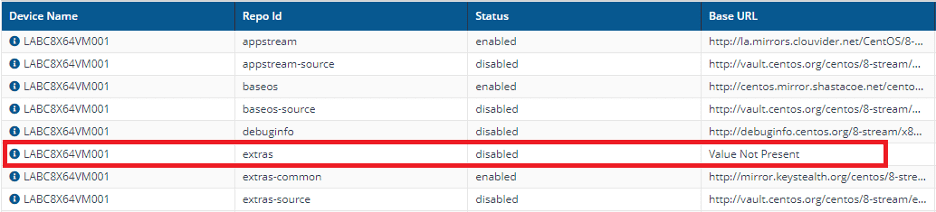
Looking at the repositories on the CentOS8 Stream device, the "extras" repository is disabled. In this case there were nine additional mirrors for the "extras" repository (seen as a parenthetical note to the BaseURL value when the result is exported to CSV and opened in Excel). You'll notice that, after disabling the repository, the BaseURL column for the repository shows "Value Not Present". This only happens where there are additional mirrors listed for a Yellowdog family repository. If the repository is re-enabled, the BaseURL and the additional mirrors are re-enabled.
The repository can be enabled by making the appropriate selections in the Edit Linux Yellowdog Repositories instruction.
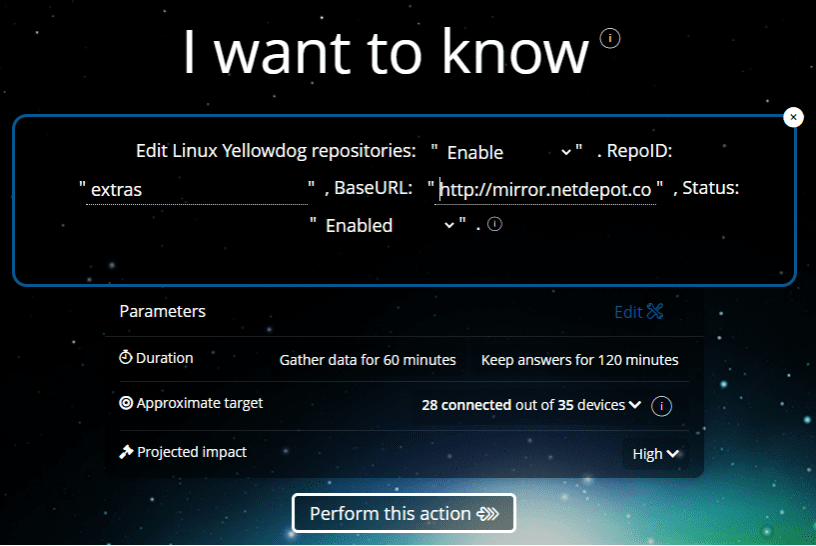
The BaseURL is restored upon re-enabling the repository.
We've already mentioned that apt and zypper instructions to edit repository configurations work the same way. Adding and removing repository configurations is just as easy by providing the desired Action, RepoId, BaseURL, and Status values.
Performing updates
Once the repositories are configured as wanted, you're ready to scan for and apply package updates to the Linux devices in the environment.
Scanning for Linux updates
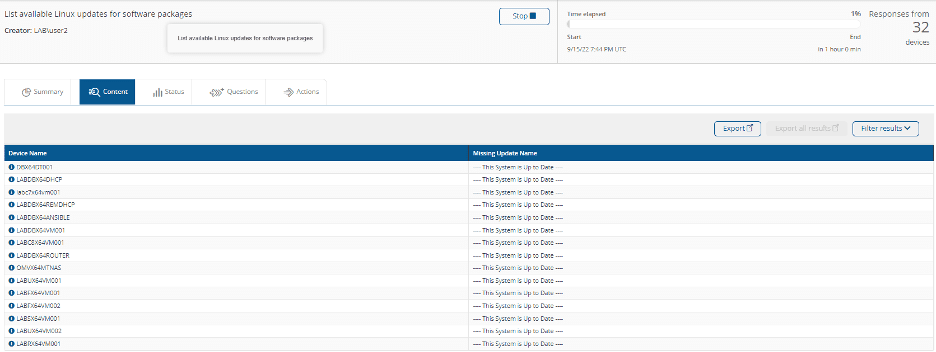
When the "List available updates for Linux software packages" instruction is run a list of all available updates for each device scanned is returned.

Performing a complete update of a Linux device
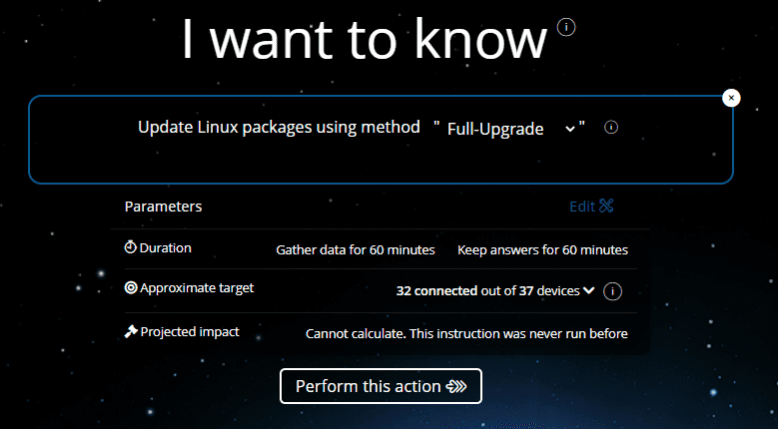
All the applicable updates for the device can be applied using the "Update Linux Packages Using Method X" instruction. The "Upgrade" method applies updates unless removal of the old package is needed and is typically the method used while a distro is in mainstream support. The "Full-Upgrade" method applies updates, removing old packages as needed. This is typically used when upgrading a distro that's End of Life. The example here will run Full-Upgrade against the Linux devices in the environment and a final status of the upgrade is seen in the results.
As this instruction is an Action, it must be approved before it is executed on the endpoints. Once approved and the instruction completes, the final status should appear as follows:
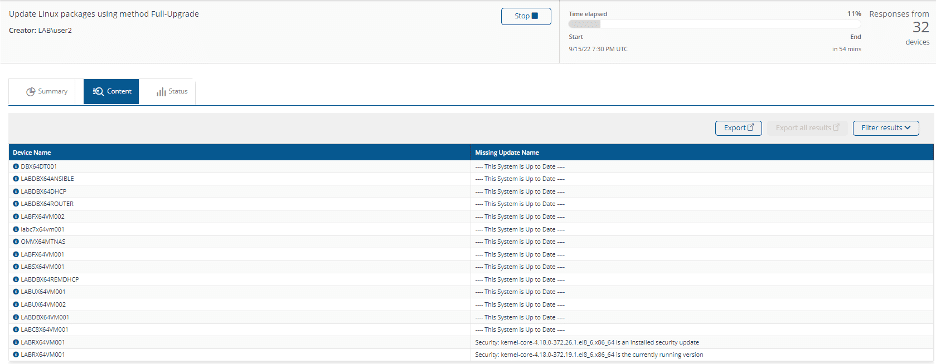
Systems that are up to date have a status of "This system is up to date".
In the case of the last system shown (RedHat server LABRX64VM001) the status is a little different. There are two entries for that system. One shows an "installed security update" and the second shows a "currently running version". When entries for both an installed update and a currently running version are seen for the same system, it indicates that the system needs a reboot to complete the update. In that case, the Linux System Power Action instruction can be targeted to that system to reboot it.
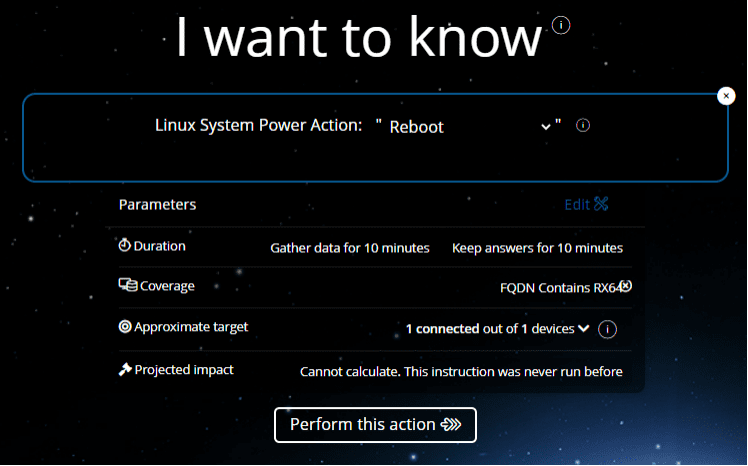
After the system reboot, run the List Available Linux Updates for Software Packages instruction again to verify that the update application is complete, in this case for the RedHat server.
So far, this blog has shown how to apply all applicable updates to Linux devices. It's also possible to update individual packages.
Performing individual package updates on a Linux device
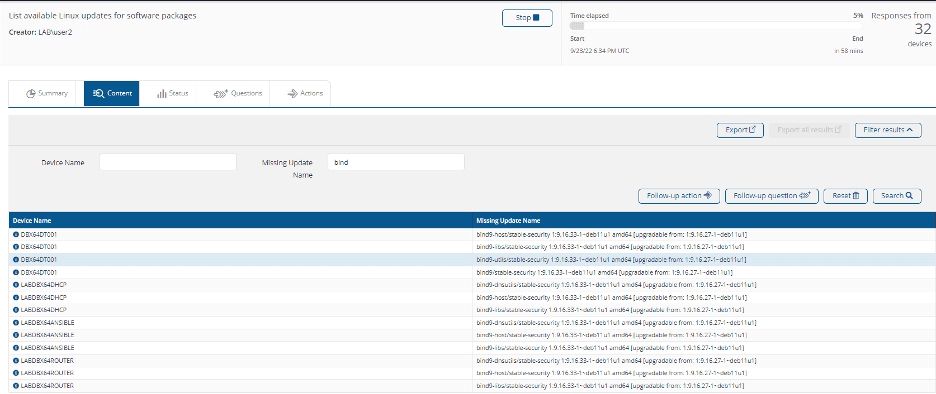
Let's say I want to check to see if any updates are available for any packages with "bind" in the name. Running the List Available Linux Updates for Software Packages instruction and filtering the output for bind will show me where that package is installed and if there are updates available.
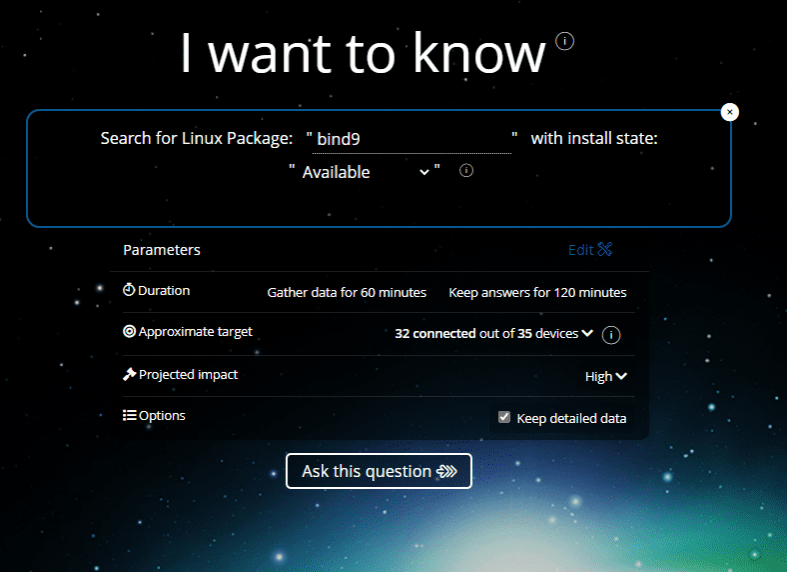
Another instruction which can be used to find the updates for a specific package is Search for Linux Package X with Install State X.
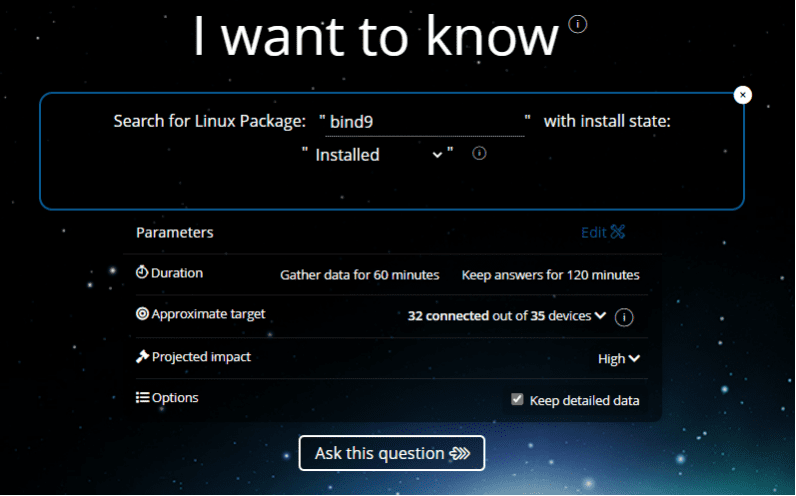
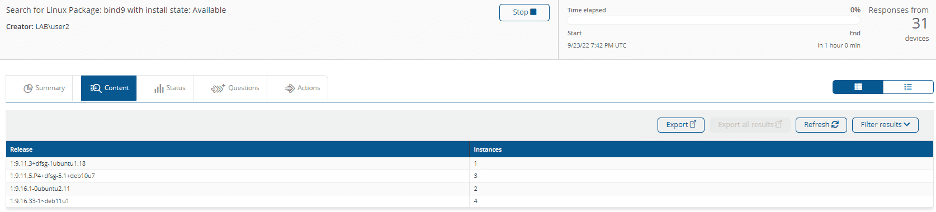
Here, bind9 is the package that will be searched for, and the Install State is Installed. The other Install State options are Any and Available. Running the instruction returns the following information:

The releases are aggregated and the number of devices where the package meets the state indicated are seen in the Instances column. If I click on a row, it shows the specific information about that release. In this case, the device where that release is installed is identified. The installed versions of the packages in the environment can be aggregated and, for example, versions with known vulnerabilities can be further investigated. Do so by clicking on the row for that version and identifying the devices on which that version is installed.
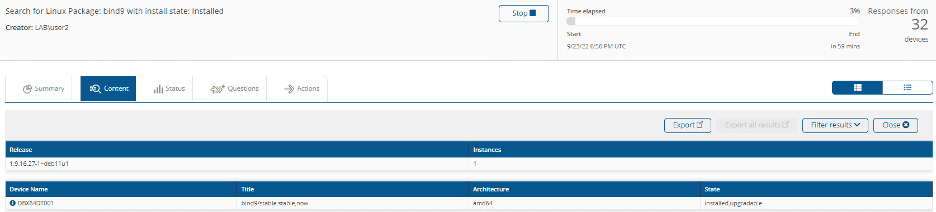
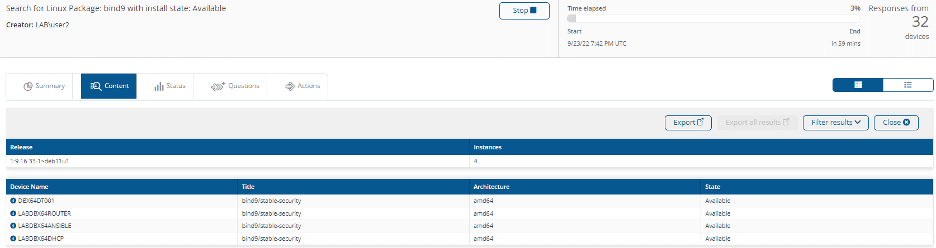
The state of the package bind9 of version 1:9.16.27-1~deb11u1 that's installed on DBX64DT001 indicates that it is upgradable. The List Available Linux Updates for Software Packages instruction shown earlier indicates that the bind9 update available in the repository of the DBX64DT001 device is version 1:9.16.33-1~deb11u1. Another way to identify the update for bind9 available on the device is to run Search for Linux Package X with Install State X with an Install State of Available.
Which shows the result below:
One option would be to look through the releases to find the device for which the release is available. DBX64DT001 is the first item in the list for the 1:9.16.33-1-~deb11u1 release.
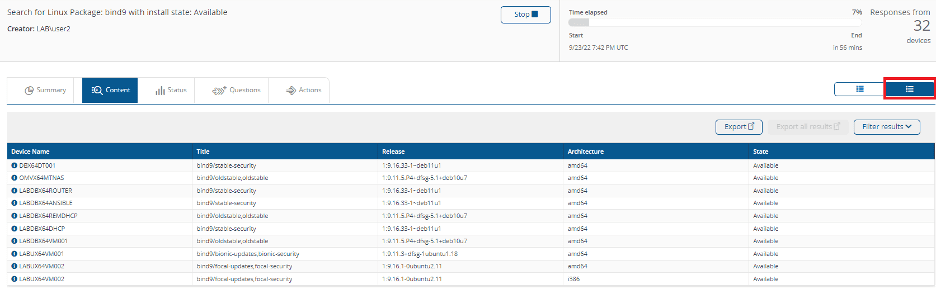
Another option would be to click the Raw Table View button above the right side of the table and find the device in the list. Again, DBX64DT001 is the first item in the list, and it shows that the 1:9.16.33-1~deb11u1 release update is available.
Finally, to update that package, run the Install Linux Package X using High Level Tools… instruction. Enter the package name, leave the Response Assumption as Yes (silent install) and select Reinstall as the Installation Type (reinstall is also used to upgrade existing packages). In this example, the DBX64DT001 device is also the only device targeted, but multiple devices can be targeted using management groups.
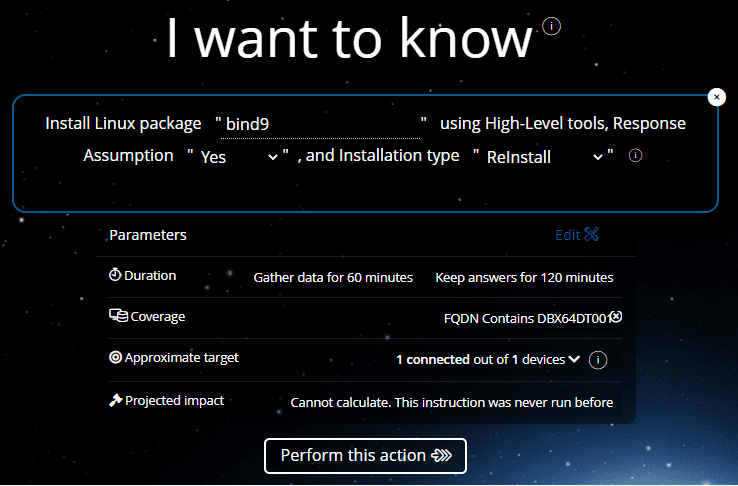
As with the earlier action that updated all packages, this instruction requires approval before continuing. Once approved and completed, the status of the update can be identified on the 1E Platform web page. In this example, the PackageInfo column shows that the bind 9 1:9.16.33-1~deb11u1 is installed on DBX64DT001.

In this blog we've seen how to; examine and configure Linux repository configurations, scan Linux devices to identify all available updates in the configured repository, how to apply all available updates to devices, how to identify available updates for individual packages, and how to apply updates to individual packages.
Stay tuned for parts two and three on Linux over the upcoming weeks!


