Windows 10 includes new security features that help protect systems from a variety of attacks. To take advantage of these new capabilities you must configure systems for UEFI and SecureBoot. Although many systems that are running Windows 7 today are fully capable of being configured for UEFI and SecureBoot, Windows 7 did not fully support UEFI, therefore they are currently running in the legacy BIOS mode. Due to this, during your Windows 10 deployment, you must reconfigure the firmware to enable UEFI and SecureBoot if you plan on implementing the new security features that Windows 10 offers. If you are deploying Windows 10 using ConfigMgr, starting with the release of 1610, Microsoft made enhancements that improve this process.
1E has the 1E BIOS to UEFI tool that automates Vendor tools along with Custom Task Sequence steps. Prior to ConfigMgr 1610 to use the 1E BIOS to UEFI step the boot image had to be less than the 400MB. This was due to the 512MB Scratch space limit within WinPE.
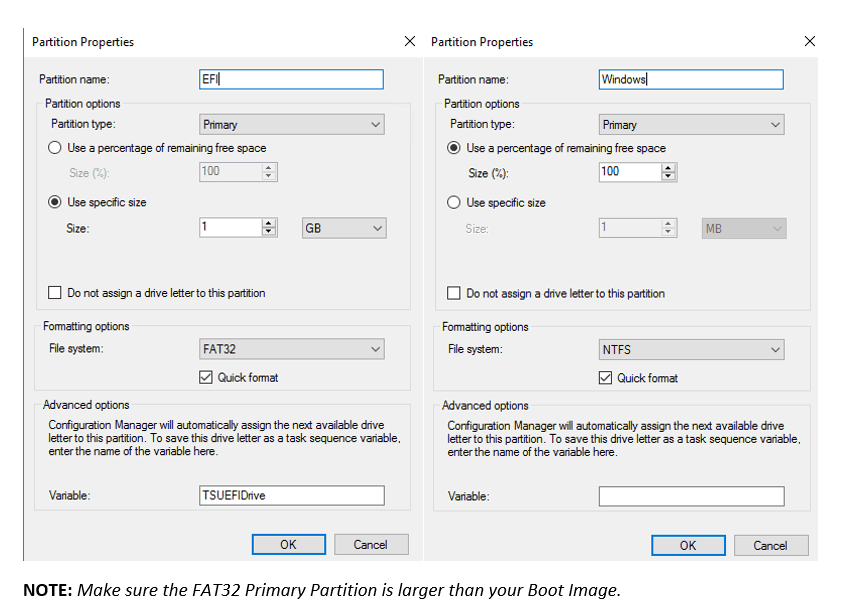
Starting in ConfigMgr 1610 you can now accomplish a BIOS to UEFI conversions using the TSUEFIDrive variable. You can place the following steps in your OS deployment task sequence to prepare a FAT32 partition on the hard drive to convert to UEFI.
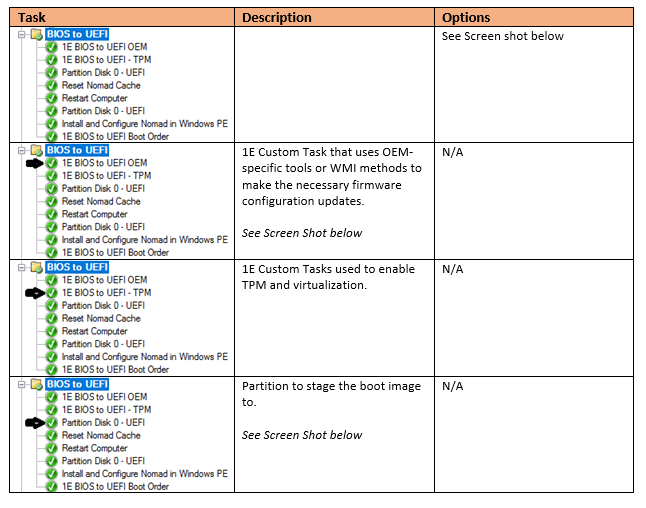
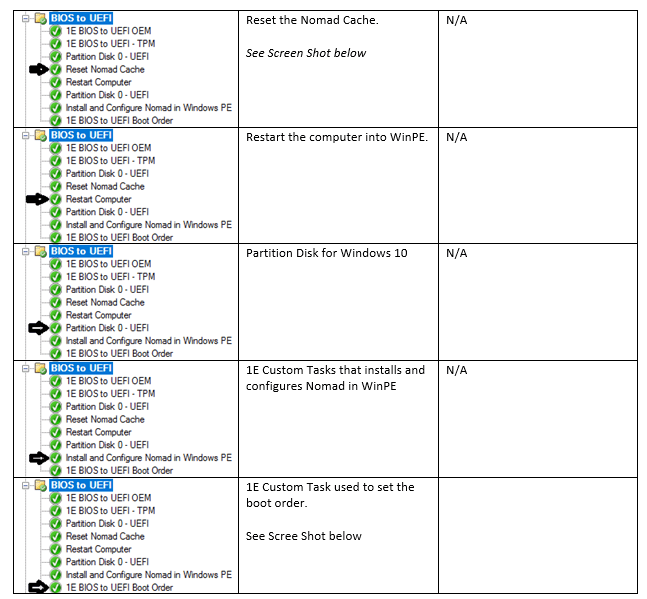
Use the following steps along with 1E’s BIOS to UEFI custom Task Sequence steps:
BIOS to UEFI Conditions – Group
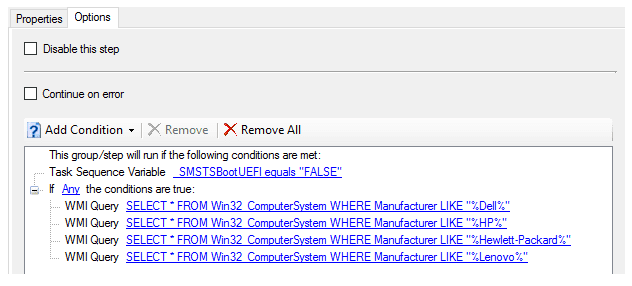
The following conditions will only allow the BIOS to UEFI group to execute if it’s not already UEFI and meets the hardware manufacturer’s listed.
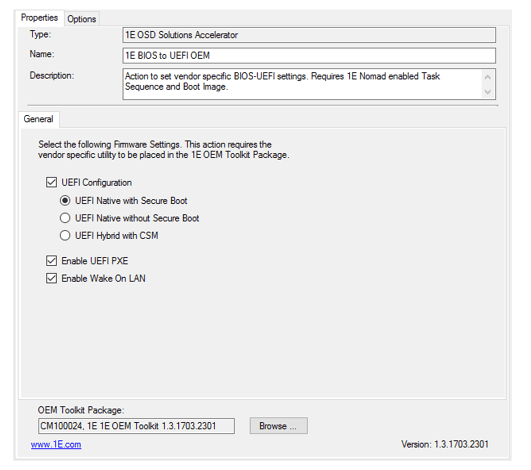
1E BIOS to UEFI OEM – Step
1E Custom Task that uses OEM-specific tools or WMI methods to make the necessary firmware configuration updates.
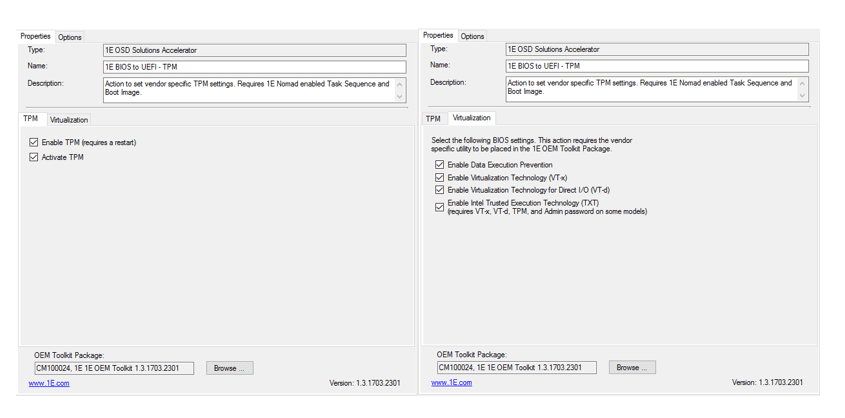
1E BIOS to UEFI – TPM – Step
1E custom creates task sequence step that can enable and activate TPM and enable Virtualizations. This step is not necessary for the BIOS to UEFI conversion.
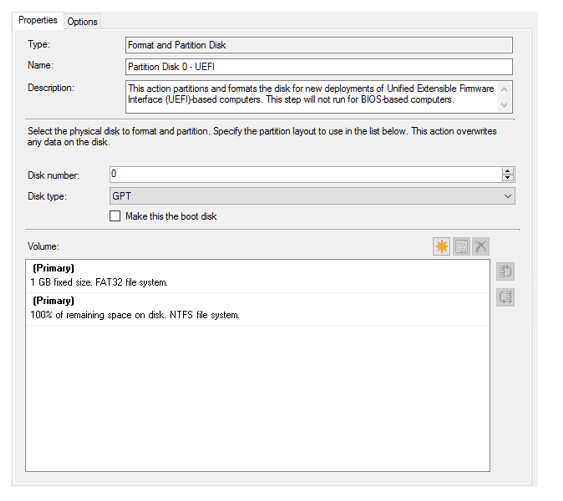
Partition Disk 0 – UEFI – Step
The following screenshots show how the two partitions are to be configured to perform the BIOS to UEFI conversion.
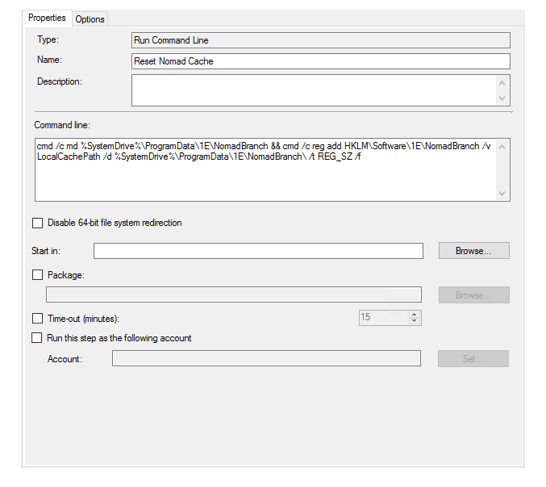
Re-set Nomad Cache – Step
As we are transitioning the drive format during the 1E BIOS2UFI process, we must redirect the Nomad cache to a temporary drive letter.
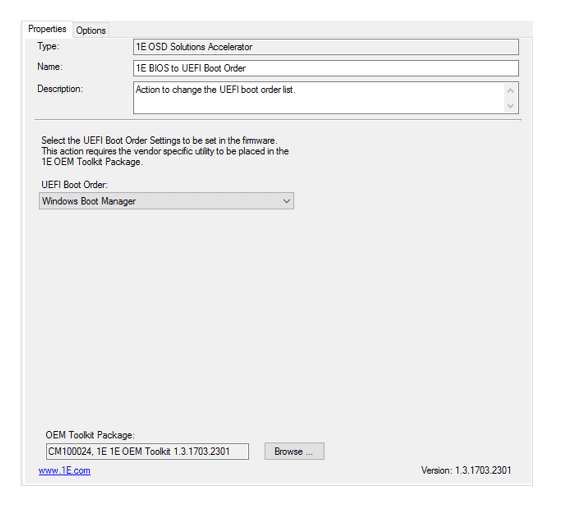
1E BIOS to UEFI Boot Order – Step
1E custom task sequence step that allows you to change the boot order if necessary.
Options:
-
Windows Boot Manager
– sets the Windows Boot Manager to be the only device in UEFI boot list. The Windows Boot Manager appears in the boot list only if a previous OS was installed in UEFI mode. If this entry is not found when the boot or Windows Boot Manager – sets the Windows Boot Manager to be the only device in UEFI boot list. The Windows Boot Manager appears in the boot list only if a previous OS was installed in UEFI mode. If this entry is not found when the boot order step in the task sequence runs, the primary hard drive is used. Other UEFI devices such as optical drives, network adapters are disabled when you choose Windows Boot Manager. On machines where you cannot disable a UEFI device, Windows Boot Manager is prioritized at the top of the list and UEFI devices that cannot be disabled are ordered at the bottom of the list.
-
Windows Boot Manager, UEFI PXE
– the boot order is Windows Boot Manager, followed by UEFI PXE. All other UEFI devices such as optical drives are disabled. On machines where you cannot disable UEFI devices, they are ordered at the bottom of the list.
-
UEFI PXE
– IPv4 and IPv6 devices are supported but precedence is given to IPv4.
