Here we are again, delving further into Windows Failover Clusters. This series has been following the construction of a Windows cluster and in this installment we're going to layer SQL Server onto the Failover Cluster that we built in Part 3.
The first two parts of the series covered Using iSCSI to Connect to Shared Storage (Part 1) and Configuring Shared Disk in the OS (Part 2). So without further ado, let's create a basic SQL Server Cluster.
First, the initial SQL Server node must be created. Start the SQL installation and follow the steps outlined below. Remember, these are just basic steps. You might want to change the way some of the steps are performed, like using different credentials for each of the SQL services.
Creating a SQL Server cluster starts with cluster validation. The SQL cluster installation will fail if the validation is not performed.
| Step |
Description |
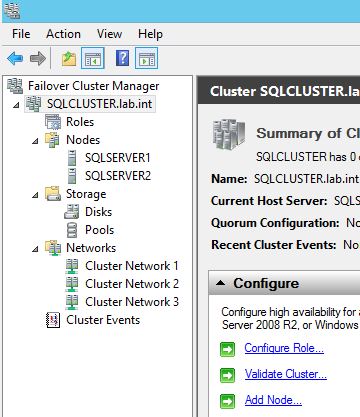 |
Open the Failover Cluster Manager as we have done in the preceding blog in this series. Click the Validate Cluster in the center section. |
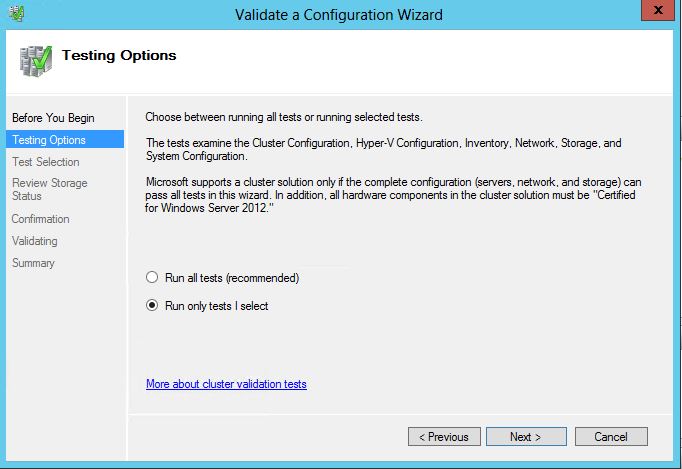 |
As we discussed in the blog on creating a Windows Failover Cluster, it is most desirable to select the Run all tests option in the Testing Options screen, but since the storage I am using in my lab is not supported for Windows 2012 clustering I will be selecting the Run only tests I select option. Click Next to continue. |
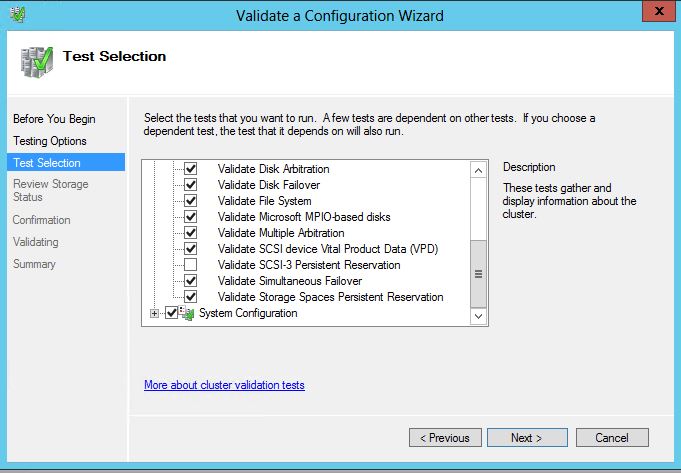 |
If you find yourself testing or learning and need to limit the tests you will see the Test Selection screen, where I am deselecting the Validate SCSI-3 Persistent Reservation test. Click Next to continue. |
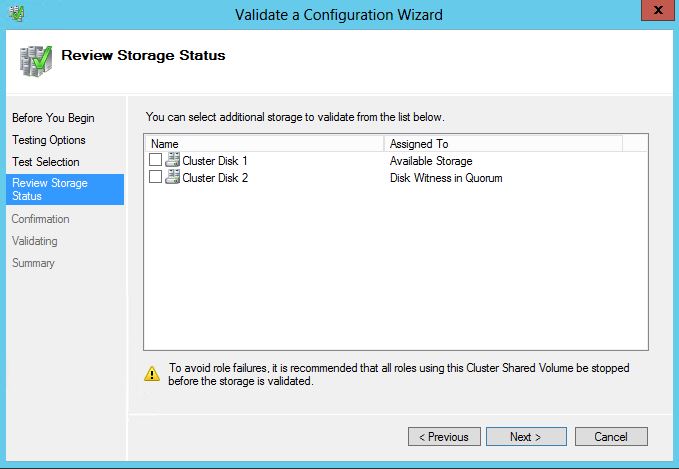 |
Due to the storage limitations in my lab I did not select any of the disks. Select the disks as desired and click Next to continue. |
 |
Click Next at the Confirmation screen to continue. |
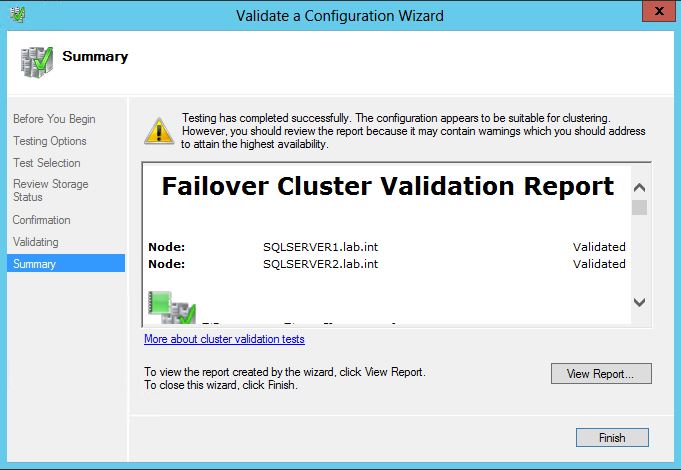 |
Once the cluster validation is complete click Finish to complete the cluster validation. As long as there are no failures the SQL Server software can be installed. There will be warnings if you need to skip any validation tests as I did, but those warnings will not prevent installation of the SQL cluster as failures will. |
Once the cluster validation is finished you can then install the SQL Server software in a clustered configuration. The following steps will walk us through that process.
| Step |
Description |
 |
Start the SQL Server software install and select the New SQL Server failover cluster installation link from the Installation section of the SQL Server Installation Center screen. |
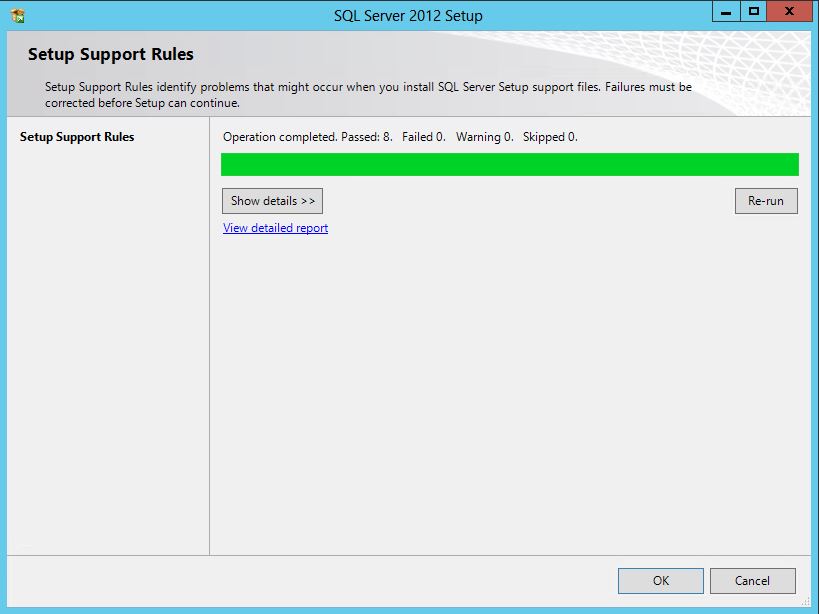 |
Click OK at the Setup Support Rules screen. If there are any errors click the Show Details button, correct any errors, and click the Re-run button before clicking OK to continue. |
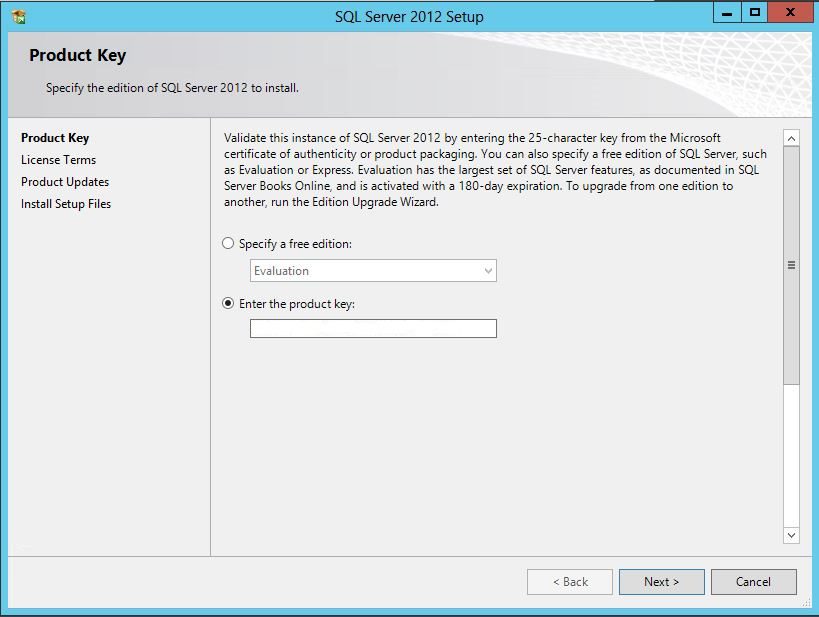 |
At the Product Key screen enter a product key and click Next to continue. |
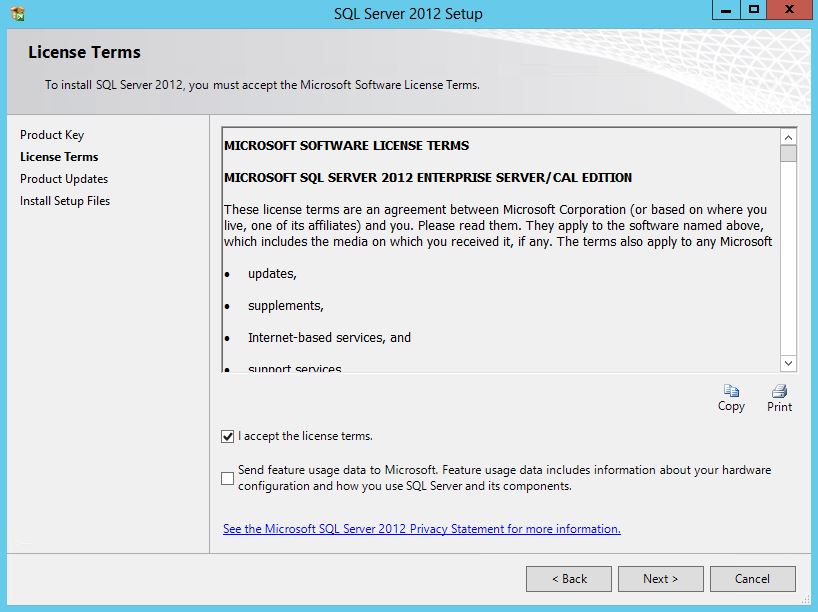 |
At the License Terms screen select the I accept the license terms checkbox and click Next to continue. |
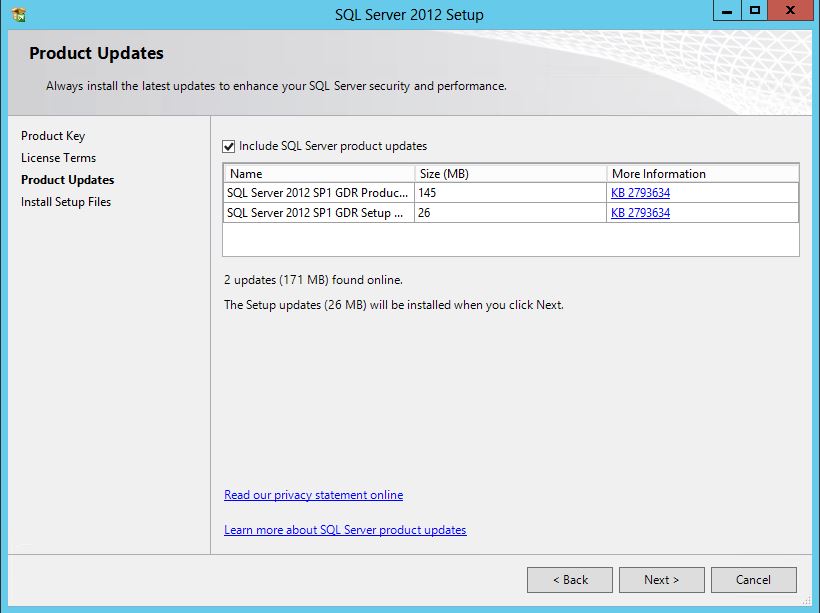 |
At the Product Updates screen select the Include SQL Server product updates checkbox. This will ensure that the latest updates to SQL Server are installed and your cluster will be up to date right from the start. Click Next to continue. |
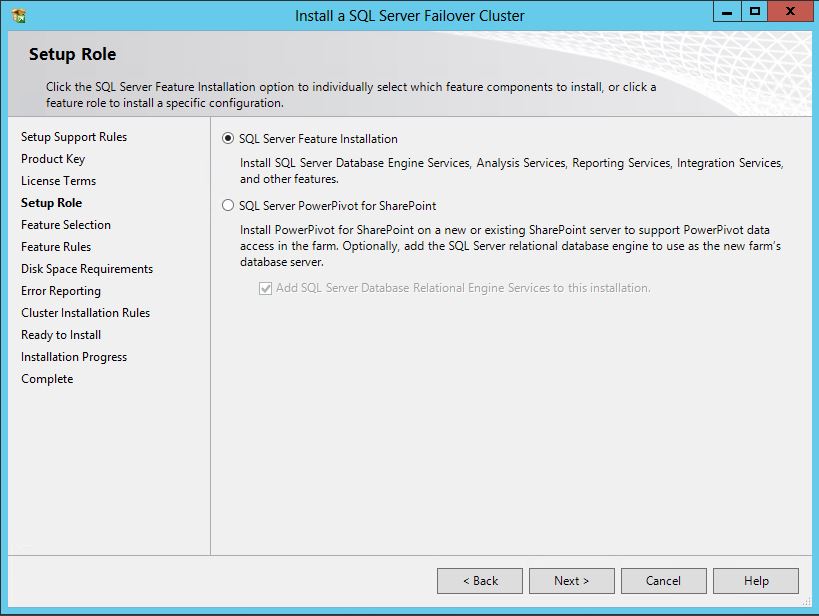 |
At the Setup Role screen select the SQL Server Feature Installation option and click Next to continue. |
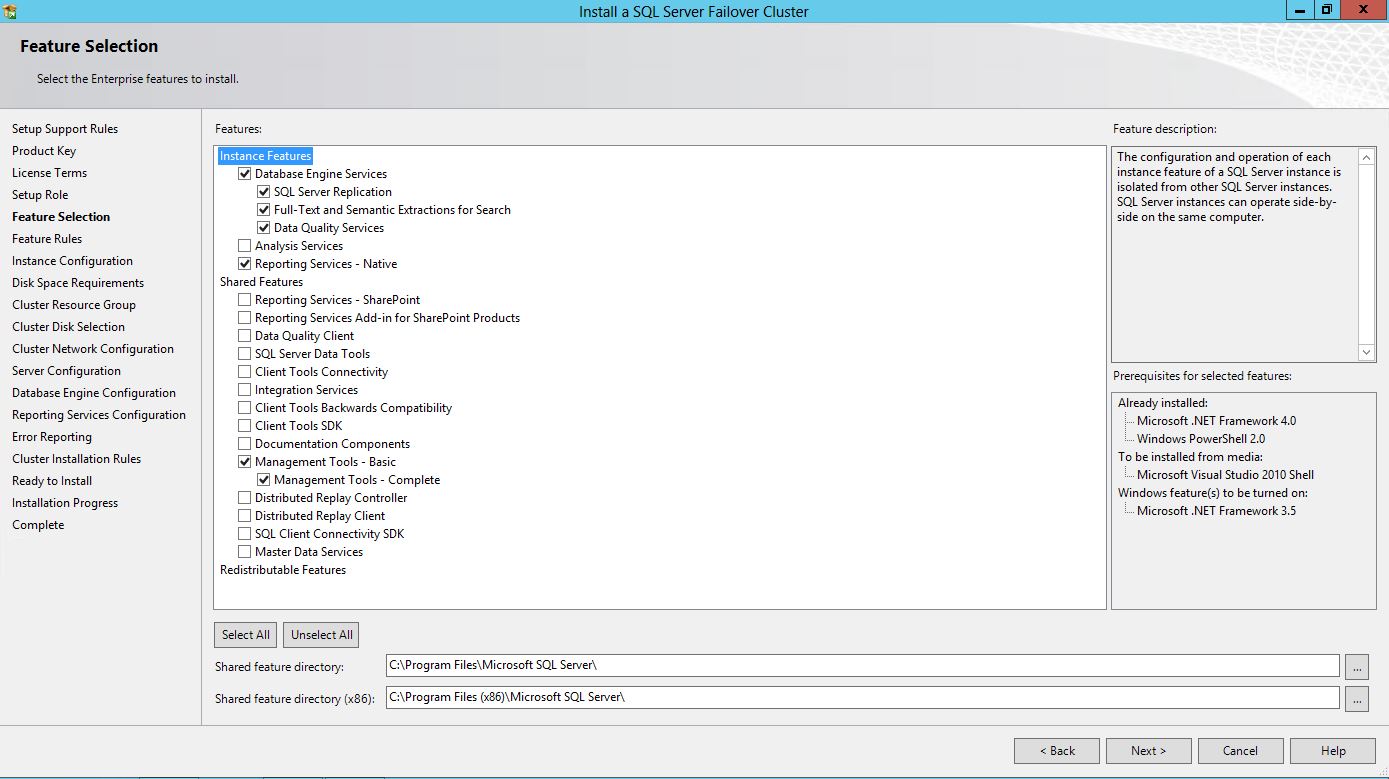 |
At the Feature Selection screen select the following items for the cluster we are building:
- Database Engine Services (All three subselections)
- Reporting Services – Native
- Management Tools (Both Basic and Complete)
Use local storage for the Shared feature directory and Shared feature directory (x86) selections and click Next to continue. |
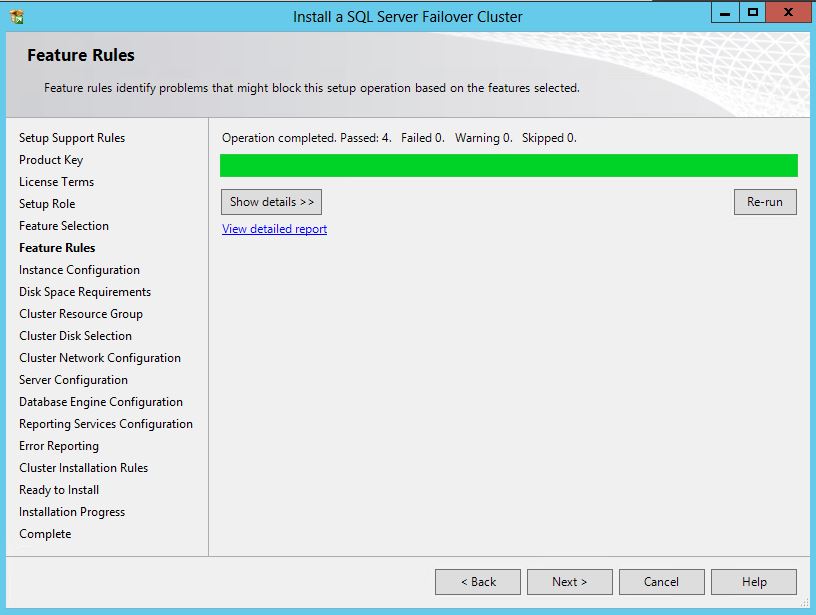 |
At the Feature Rules screen click Next to continue. If there are any errors click the Show Details button, correct any errors, and click the Re-run button before clicking OK to continue. |
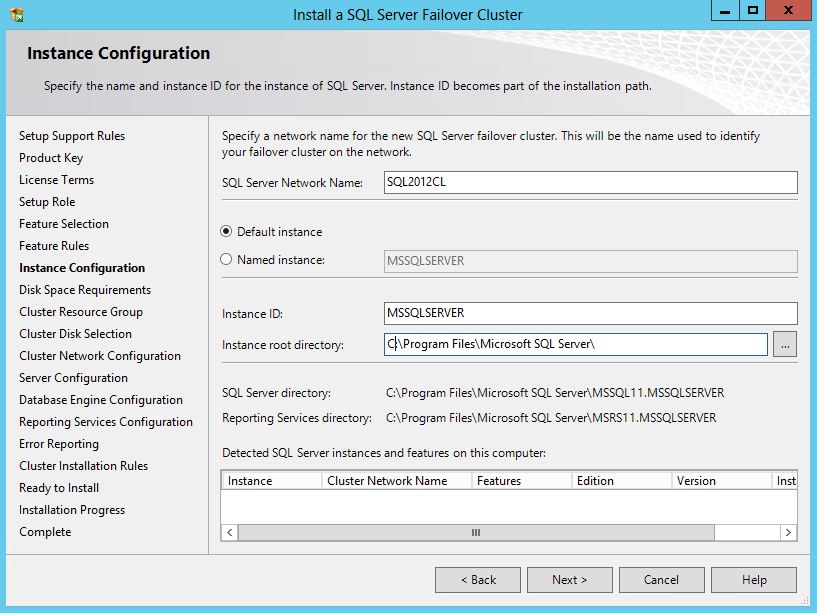 |
At the Instance Configuration screen enter a SQL Server network name. This will be used in identifying the SQL cluster on the network. the instance root directory will remain on local storage. We are not yet at the place in the install where we tell SQL where the shared storage is. Click Next to continue. |
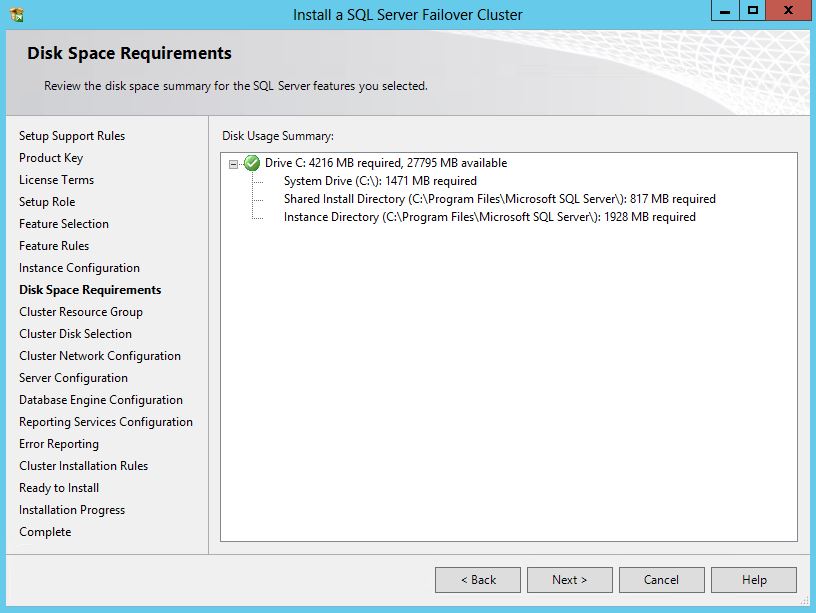 |
At the Disk Space Requirements screen click Next to continue. |
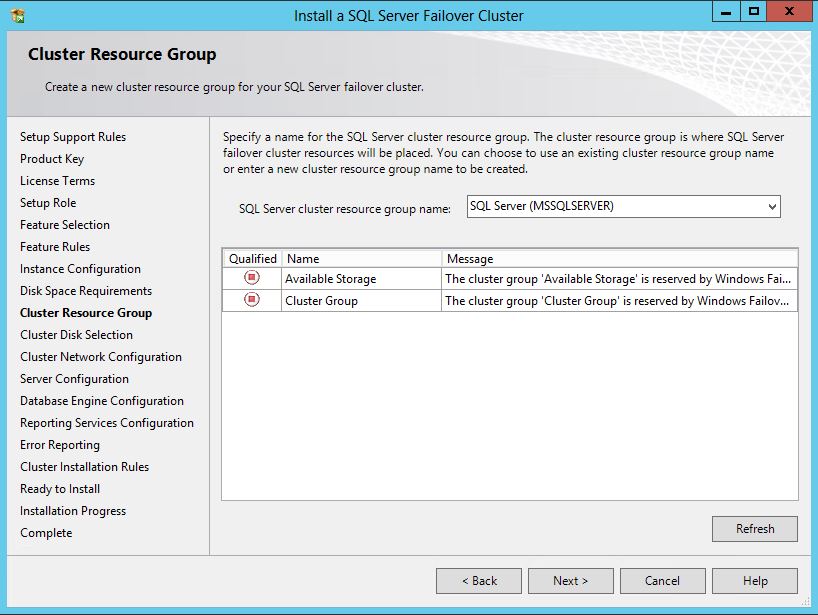 |
At the Cluster Resource Group screen click Next to continue. The storage that we have configured is owned by the cluster and we will be creating a new cluster resource group for SQL to use, so for this screen you don't need to be concerned about the icons in the Qualified column. |
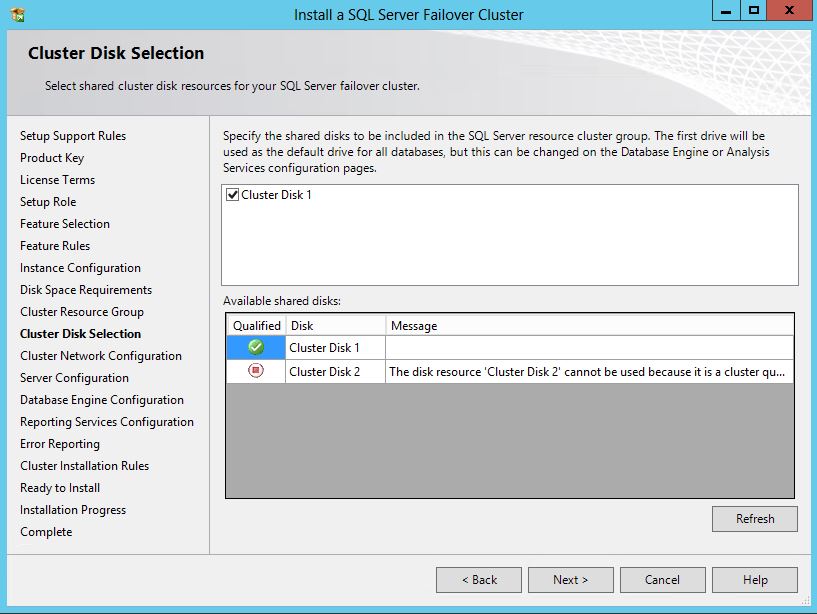 |
At the Cluster Disk Selection screen select the qualified disk that you want to be used as the shared storage for your SQL cluster. Here we see that Disk 1 is qualified, and Disk 2 is not. Disk 2 is not qualified because it is reserved as the Quorum disk. Click Next to continue. |
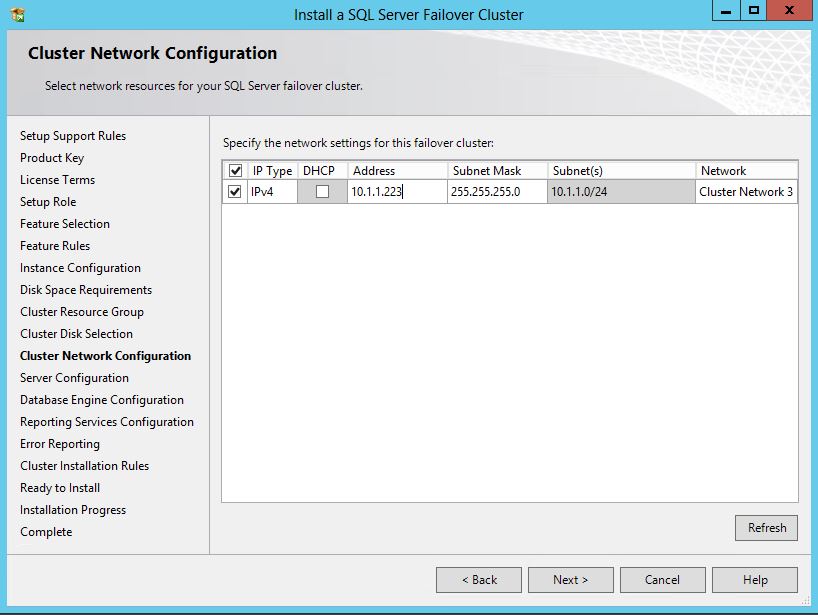 |
In the Cluster Network Configuration screen select the IP type you want to use for cluster communications. In our example we only have IPv4 enabled, and that is the one I selected. It is not a good idea to use DHCP to manage the address here, so that selection has been left deselected. Finally, enter an IP address, which will be used for the SQL Server network name that you entered in the Instance Configuration screen. Click Next to continue. |
 |
In the Server Configuration screen you need to add a domain account for each service under the Account Name column and be sure to enter the password as well. Do not change the startup type, as the SQL cluster will handle the startup of the services. |
 |
In the Database Engine Configuration screen we will simply select Windows Authentication Mode and add the domain administrator as a SQL administrator. Check the Data Directories tab to ensure that the data files will be stored on shared storage and click Next to continue. |
 |
Select Install and Configure and click Next at the Reporting Services Configuration screen. |
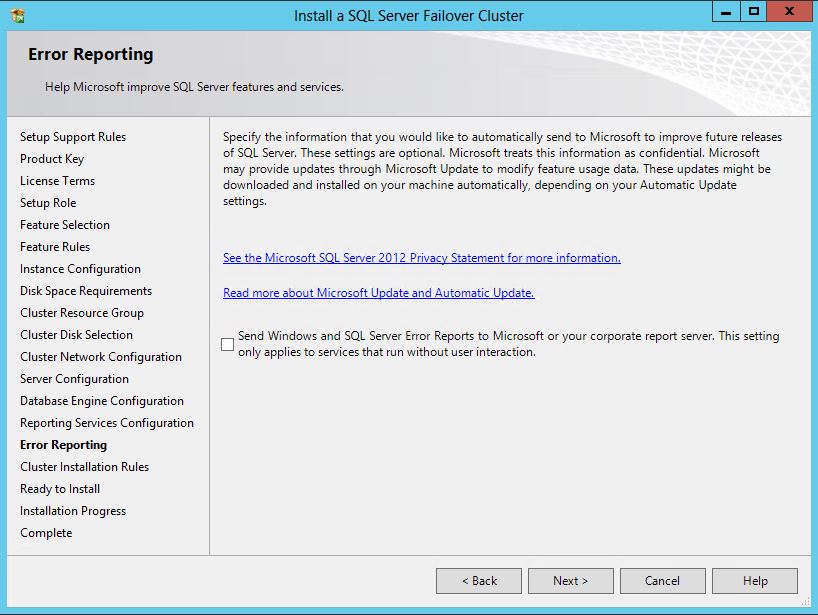 |
Click Next at the Error Reporting screen. |
 |
Click Next at the Cluster Installation Rules screen. If there are any errors click the Show Details button, correct any errors, and click the Re-run button before clicking OK to continue. |
 |
Click Install at the Ready to Install screen. |
 |
Check that the installation has completed successfully and click Close at the Complete screen. |
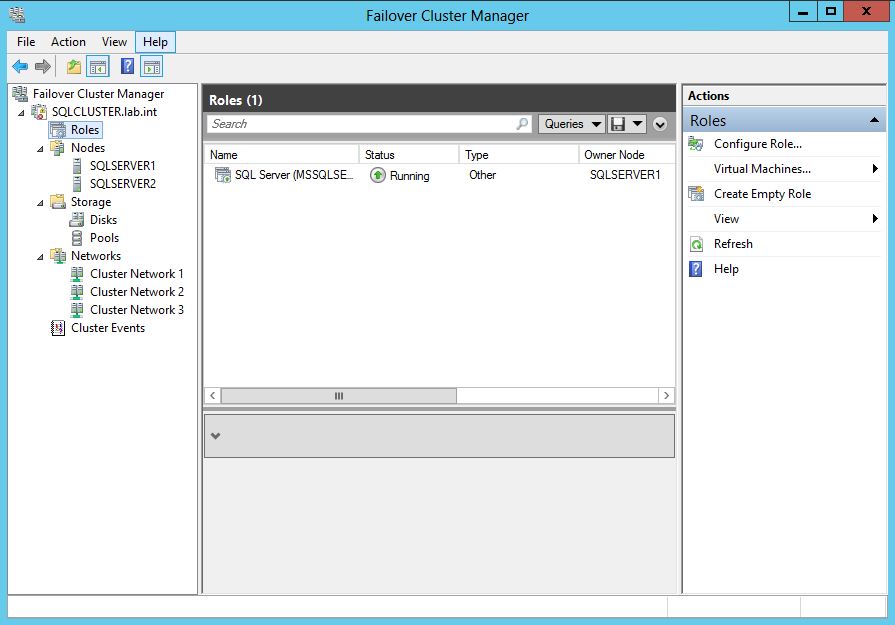 |
Finally, open the Failover Cluster Manager and check the Roles node for the presence of the SQL Server role as shown. |
Now that the first SQL node is installed, we will run the SQL installation from the other node in the cluster and add that server as a node in the SQL cluster following the steps as outlined below.
| Step |
Description |
 |
On the second node of the cluster start the SQL Server installation and select the Add node to a SQL Server failover cluster link. |
 |
Allow the Setup Suport Rules screen to complete and click OK when the checks have completed. If there are any errors click the Show Details button, correct any errors, and click the Re-run button before clicking OK to continue. |
 |
At the Product Key screen enter a license key and click Next to continue. |
 |
Select the I accept the license terms checkbox and click Next to continue at the License Terms screen. |
 |
Select the Include SQL Server product updates checkbox and click Next to continue at the Product Updates screen. |
 |
Allow the Setup Suport Rules screen to complete and click OK when the checks have completed. If there are any errors click the Show Details button, correct any errors, and click the Re-run button before clicking OK to continue. NOTE: There are some warnings displayed in the screenshot shown. Warnings will not prevent SQL Server from installing and the ones shown occurred because I did not configure my lab optimally. |
 |
At the Cluster Node Configuration screen the instance, cluster node names, and Cluster Network Name are automatically detected. Setup is detecting this information from the Windows Failover Cluster that the node is a part of. Click Next to continue. |
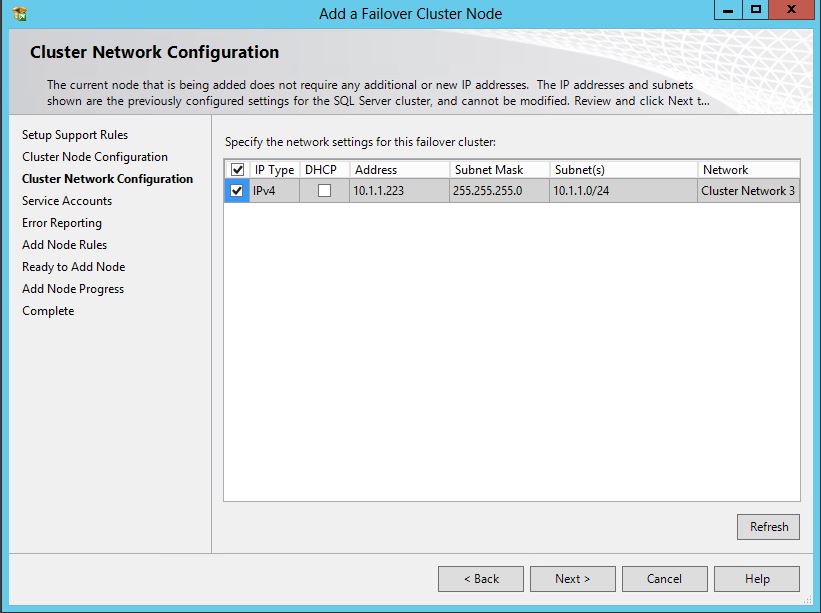 |
You will also see that at the Cluster Network Configuration screen the IP information is automatically detected as well, for the same reason as mentioned for the previous screen. Click Next to continue. |
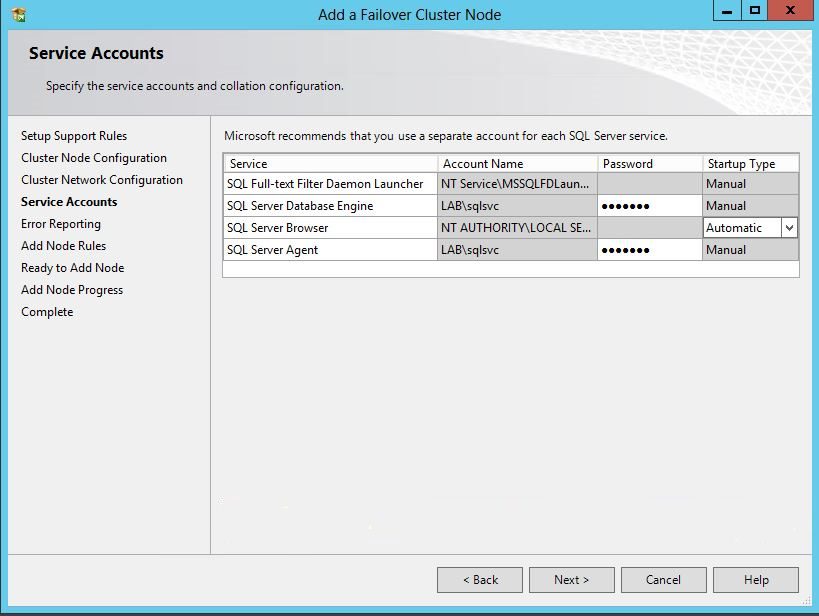 |
At the Service Accounts screen the accounts are automatically detected but you will need to enter the passwords for the accounts. Click Next to continue once you have entered the passwords. |
 |
Click Next at the Error Reporting screen. |
 |
Allow the Add Node Rules screen to complete its checks and click OK when they have completed. If there are any errors click the Show Details button, correct any errors, and click the Re-run button before clicking OK to continue. |
 |
Review the summary provided and click Install at the Ready to Add Node screen. |
 |
After the installation has completed click Close at the Complete screen. |
 |
You can then check the Failover Cluster Manager and see the SQL Server role has been added to the cluster. Make a note of the cluster node that owns the role. You will open Failover Cluster Manager on the other node during the failover test below. |
Now that both nodes of the SQL Server cluster have been installed over the Windows Failover Cluster you should perform some failover tests to confirm that SQL is working. We'll go through a simple test here.
First, install the SQL Server Management Studio on a machine that is not a part of the cluster. I used a workstation in the lab I've been building throughout this series. Connect to the cluster using the SQL cluster alias. A rudimentary failover test could be to run a query against the master database before and after a simulated failure. I ran the following query:
SELECT * FROM [master].[dbo].[spt_monitor]
It returned one row. Open the Failover Cluster Manager on the node that is not the owner of the SQL Server role. Next, disconnect the network cards of the node that owns the SQL Server role as we did when testing the underlying Windows Failover Cluster in the preceding part of this series. Again, we want to simulate a failure. We don't want the cluster sensing a shutdown or a service stoppage because then it will perform a planned failover, and in the real world it isn't the planned failovers that we are trying to protect ourselves from.
After disconnecting the machine from our IT universe we should then see the cluster failover to the second node. The disk resources should fail over, and the SQL Server role will do so as well. You can see all of this in the Failover Cluster Manager as the resources go offline and come back online, and the machine name in the Owner Node column is updated. Finally, run the query against the master database again and you will see that it returns the same row. Then you know that your cluster has successfully failed over.
Now, I know that this is a rudimentary test. You can set up an application to use this clustered database and verify that the application continues to work as you fail the nodes back and forth. I would encourage that this be done in the real world, and in this series we will do that in a future installment. Right now we are looking into the things we can do to set up different clusters and at this point are keeping it simple.
I am performing all of the tasks being outlined in each blog installment as I am writing them, hoping that your experience is the same as you follow along. This information can all be found elsewhere, but it is scattered around and this is an attempt to bring it together under one roof.
There are advanced clustering options in the SQL Server setup, and there are numerous options for getting your database clustered, and this is one of them. Next, we will look at creating a generic service on a cluster to create an application cluster.


